Skillet Chicken Thighs: Perfect and Juicy
- Time:5 mins active + 20 mins cook
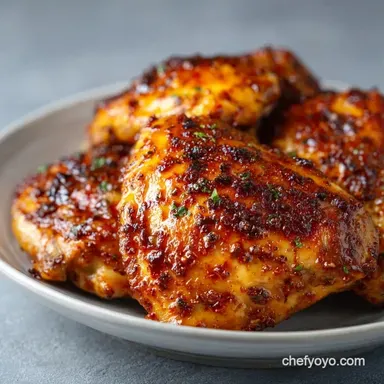
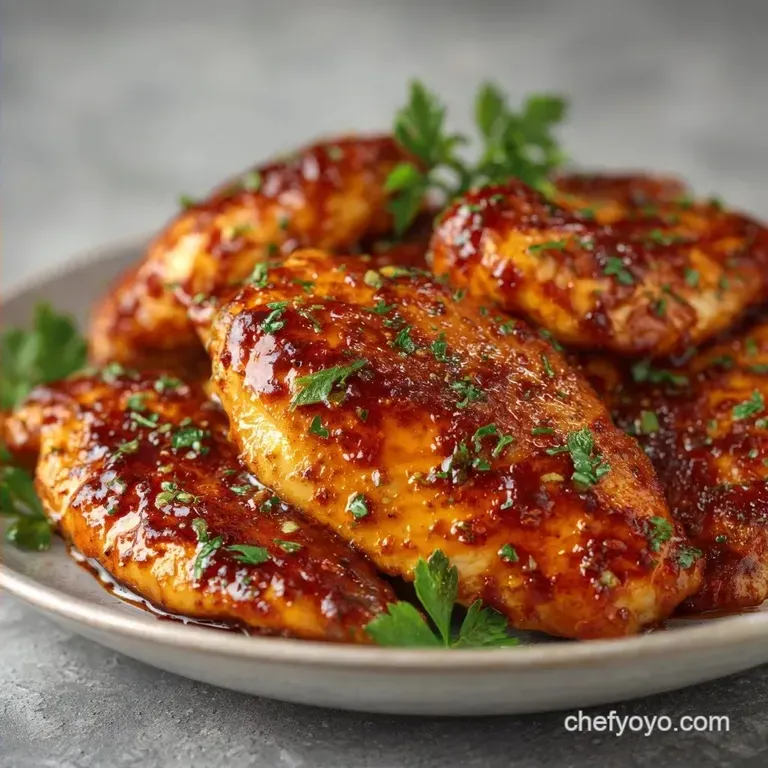
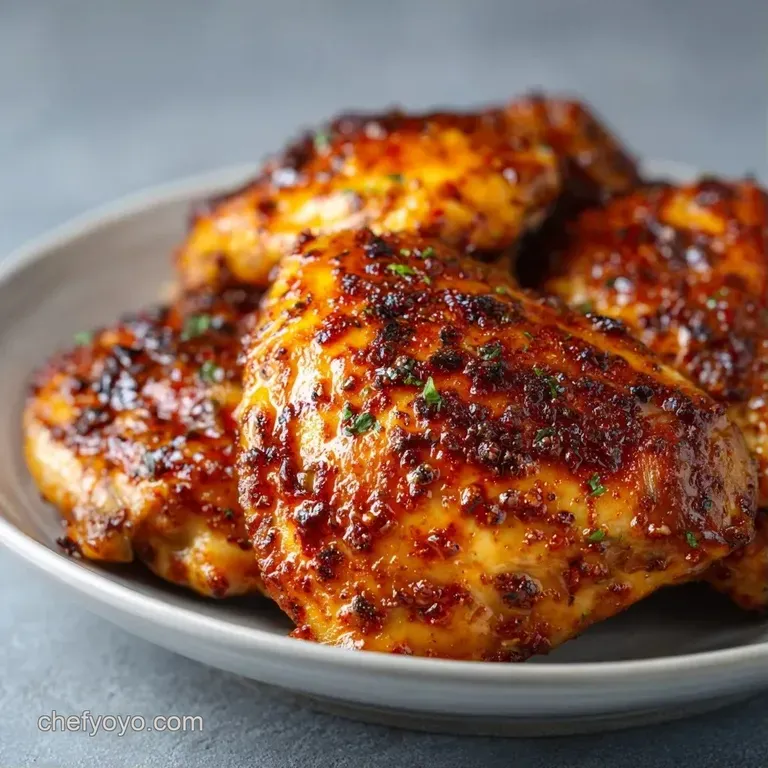
- Flavor/Texture Hook: Mahogany crust with a velvety garlic butter finish
- Perfect for: Fast weeknight dinners or beginner friendly hosting
- Skillet Chicken Thighs
- Why This Quick Dinner Works
- Essential Ingredient Breakdown
- The Minimal Tool Kit
- Step by Step Cooking Guide
- Fixing Common Pan Mistakes
- Troubleshooting Common Issues
- Simple Dietary Adaptations
- Adjusting the Batch Size
- Truths About Searing
- Storage and Leftover Ideas
- Best Ways to Serve
- Recipe FAQs
- 📝 Recipe Card
Skillet Chicken Thighs
That sudden, aggressive sizzle when the meat hits the hot oil is the best sound in the kitchen. I remember the first time I tried making this. I was convinced that "searing" just meant putting meat in a pan, so I tossed in six thighs at once.
Instead of a crust, I got a grey, sad, steaming pile of chicken that looked like it had been boiled in its own juices. It was a total disaster, and I almost gave up on pan frying entirely.
The secret I learned the hard way? Patience and space. You have to let the pan get screaming hot and give the chicken room to breathe. When you finally get that mahogany colored crust, and the aroma of toasted garlic and smoked paprika fills the room, you realize why this method beats the oven every single time.
We're making Juicy Skillet Chicken Thighs that actually stay moist. No more rubbery textures or dry edges. We'll use a few simple tricks, like patting the meat bone dry and basting with foaming butter, to get a result that feels fancy but takes almost no effort. Trust me on this, once you stop overcrowding your pan, your life changes.
Why This Quick Dinner Works
I used to think it was just about the heat, but there's a bit of logic to why this specific process works so well. It's all about managing moisture and fat.
Dry Surface: Removing surface water prevents the chicken from steaming. This allows the heat to immediately brown the meat instead of boiling the water off first.
Fat Layering: Starting with avocado oil handles the high heat, while adding butter at the end provides the flavor and velvety texture. This gives you the best of both worlds: a hard sear and a rich finish.
The Baste: Spooning hot butter over the chicken pushes heat into the center of the meat more efficiently than just frying. It also coats the exterior in a savory glaze.
If you enjoy this kind of rich, pan seared finish, you'd probably love my creamy chicken and mushrooms recipe, which uses a similar searing technique before adding the sauce.
| Method | Time | Texture | Best For |
|---|---|---|---|
| Pan Searing | 30 mins | Crispy exterior, juicy center | Fast weeknights |
| Oven Bake | 45 mins | Evenly cooked, softer skin | Large batches |
| Air Fryer | 25 mins | Very dry crust, leaner | Single servings |
Essential Ingredient Breakdown
Before we get into the pan, let's look at what's actually happening with the ingredients. I don't use fancy stuff here, just a few pantry staples that do the heavy lifting.
| Ingredient | Science Role | Pro Secret |
|---|---|---|
| Avocado Oil | over High heat stability | Prevents the oil from smoking and tasting bitter |
| Unsalted Butter | Flavor & Browning | Added late so the milk solids don't burn |
| Lemon Juice | Acid Balance | Cuts through the heavy fat of the thighs |
| Smoked Paprika | Color & Depth | Gives that "grilled" look without a BBQ |
The Minimal Tool Kit
You don't need a kitchen full of gadgets for this. In fact, too many tools just mean more cleanup. For these Skillet Chicken Thighs, keep it basic.
A cast iron skillet is my absolute favorite for this. It holds heat better than any other pan, which means when you drop the chicken in, the temperature doesn't plummet. If you don't have one, a heavy stainless steel pan works too.
Just avoid non stick if you can, as they often can't handle the high heat needed for a real crust.
You'll also need a pair of tongs. Don't use a fork to flip the meat, or you'll poke holes in the surface and let all those juices leak out. A simple meat thermometer is the only "fancy" tool I insist on. It's the only way to be 100% sure the chicken is safe but not overcooked.
Step by step Cooking Guide
Right then, let's crack on with the cooking. Make sure your chicken is ready and your pan is heating up before you start the timer.
- Pat the chicken thighs completely dry with paper towels. Note: This is the most important step for a crust.
- Season both sides generously with 1 tsp kosher salt, 1/2 tsp cracked black pepper, 1 tsp garlic powder, and 1 tsp smoked paprika.
- Heat 2 tbsp avocado oil in a cast iron skillet over medium high heat until it shimmers and just begins to smoke.
- Place chicken thighs in the pan. Cook undisturbed for 6-8 minutes until a mahogany colored crust forms and the meat releases easily from the pan.
- Flip the thighs and reduce heat to medium.
- Add 3 tbsp unsalted butter and 3 cloves smashed garlic cloves to the skillet.
- Continuously spoon the foaming garlic butter over the chicken for 6-10 minutes, until the internal temperature reaches 74°C (165°F).
- Remove from heat and drizzle with 1 tbsp fresh lemon juice.
- Garnish with 1 tbsp chopped fresh parsley.
- Let the meat rest for 5 minutes before serving. Note: Resting lets the juices redistribute so they don't run out on the plate.
Chef's Note: If the butter starts to turn dark brown too quickly, turn your heat down immediately. We want a nutty brown, not a burnt black.
Fixing Common Pan Mistakes
Even with a simple recipe, things can go sideways. Usually, it's a temperature issue.
Troubleshooting Common Issues
| Issue | Solution |
|---|---|
| Why Your Chicken Sticks | If the meat clings to the pan, you probably didn't wait long enough for the pan to heat or you tried to flip it too early. |
| Why Your Garlic Burnt | Garlic burns fast because of its natural sugars. If you add it at the start with the oil, it'll be charcoal by the time the chicken is done. Always add your aromatics during the butter basting phase. |
| Why the Meat is Rubbery | This usually happens when you crowd the pan. If the thighs are touching, they release steam, which drops the temperature and "boils" the meat. Cook in batches if your pan is small. |
Common Mistakes Checklist:
- ✓ Did I pat the chicken completely dry?
- ✓ Is the pan hot enough that the oil is shimmering?
- ✓ Did I leave the chicken alone for at least 6 minutes?
- ✓ Did I wait 5 minutes before cutting into the meat?
- ✓ Did I avoid overcrowding the skillet?
Simple Dietary Adaptations
Depending on who you're feeding, you might need to swap a few things. These Skillet Chicken Thighs are pretty flexible.
For a dairy-free Version
You can swap the butter for a high-quality vegan butter or just use more avocado oil with a pinch of extra salt. You'll lose some of that velvety richness, but the crust will still be great.
For a Spicy Twist
Add a pinch of cayenne pepper or 1/2 tsp of chipotle powder to your dry rub. This pairs beautifully with the smoked paprika and gives the dish a bit of a kick.
For a Garlic Herb Profile
Replace the smoked paprika with dried oregano and thyme. This gives the dish a more Mediterranean feel. If you're doing this, try serving it with a side of roasted potatoes.
| Original Ingredient | Substitute | Why It Works |
|---|---|---|
| Unsalted Butter (3 tbsp) | Vegan Butter (3 tbsp) | Similar fat content. Note: May have a slightly different melting point |
| Avocado Oil (2 tbsp) | Grapeseed Oil (2 tbsp) | Also has a high smoke point. Note: Neutral flavor |
| Smoked Paprika (1 tsp) | Sweet Paprika (1 tsp) | Similar color. Note: Less depth, no smoky flavor |
If you're looking for something even creamier, you could use this as a base for a garlic parmesan chicken pasta by adding a cream sauce to the pan after removing the meat.
Adjusting the Batch Size
Scaling this recipe is easy, but you can't just multiply everything and throw it in one pan.
Cutting the recipe in half: Use a smaller 8 inch skillet. You can reduce the cooking time by about 10-20% since there's less mass in the pan to absorb the heat. Use 1.5 tbsp of butter and 1 tbsp of oil.
Doubling or tripling the recipe: This is where most people fail. Do NOT try to fit 3 lbs of chicken in one skillet. Work in batches. Sear four thighs, move them to a plate, then do the next four.
Once all are seared, you can add them all back in for the final butter baste if your pan is large enough, or just baste them in two groups.
For spices, only increase them to 1.5x rather than 2x. Salt and paprika can become overpowering if you scale them linearly.
Truths About Searing
There are a few things people tell you about pan frying that just aren't true.
One big one is the idea that searing "seals in the juices." It doesn't. Moisture loss happens regardless of how you cook the meat. The reason we sear is for flavor. The browning creates complex flavor compounds that you just don't get from baking or poaching.
Another myth is that you need to "brown" the meat on all sides to make it safe. While browning is great for taste, the internal temperature is the only thing that matters for safety. As long as the center hits 74°C, you're good to go, even if the outside isn't perfectly mahogany.
Storage and Leftover Ideas
These Boneless Skinless Skillet Chicken Thighs keep surprisingly well. Store them in an airtight container in the fridge for up to 4 days.
To reheat without drying them out, avoid the microwave if you can. Instead, put them in a pan over medium heat with a tiny splash of water or a knob of butter. Cover the pan with a lid for 2-3 minutes. The steam will gently warm the meat without overcooking the center.
If you're freezing them, they'll stay good for about 3 months. Let them cool completely before freezing. Thaw them in the fridge overnight before reheating.
Zero Waste Tip: Don't throw away the brown bits stuck to the bottom of the pan (that's called the fond). After you remove the chicken, pour in a splash of white wine or chicken broth and scrape the bottom with a wooden spoon.
This makes a quick, intense pan sauce that's brilliant poured over rice or mashed potatoes.
Best Ways to Serve
Since these are so rich, you want sides that provide a bit of contrast. I love serving these with something acidic or fresh.
The Comfort Classic Pair these with creamy mashed potatoes and steamed green beans. The garlic butter from the pan is basically a sauce on its own, so it ties everything together.
The Light & Fresh Pair A crisp arugula salad with a lemon vinaigrette and some shaved parmesan works wonders here. The bitterness of the greens cuts through the fat of the chicken thighs.
The Grain Bowl Serve them over quinoa or jasmine rice with a side of roasted carrots. The rice absorbs the extra lemon garlic butter from the plate, making the whole meal feel cohesive.
Whether you're using Cast Iron Skillet Chicken Thighs or a standard pan, the result is the same: a dinner that feels like it took hours but actually only took 30 minutes. Just remember to dry that meat and give it some space to sizzle. Enjoy!
Recipe FAQs
What is the best pan for browning chicken?
Use a cast iron skillet. Its superior heat retention is what creates the deep mahogany colored crust and consistent sear.
How do I cook chicken thighs in a cast iron skillet?
Pat the meat dry, season, and sear in shimmering avocado oil. Cook undisturbed for 6-8 minutes, then flip and baste with butter and smashed garlic until the internal temperature reaches 165°F.
How to pan cook chicken thighs so they don't burn the pan?
Use avocado oil and avoid overcrowding the skillet. A high smoke point oil prevents scorching, while leaving space between thighs prevents them from steaming and leaving residue.
How long do chicken thighs take to cook on the stove?
Allow about 20 minutes of active cooking time. This includes 6-8 minutes for the initial sear and 6-10 minutes of butter basting after flipping.
How to cook chicken thighs on a griddle?
Apply the same searing and temperature principles used in a skillet. Heat the surface until the oil shimmers, sear undisturbed, and finish with butter and garlic. If you mastered the searing process here, see how the same temperature control works in our roast turkey guide.
Is it true that I should add garlic at the beginning to get more flavor?
No, this is a common misconception. Garlic burns quickly due to its natural sugars; add it during the butter basting phase to keep it aromatic and golden.
How to keep chicken thighs from sticking to the pan?
Wait for the pan to reach medium high heat and leave the meat undisturbed. The chicken will naturally release from the surface once a proper crust has formed.
Skillet Chicken Thighs