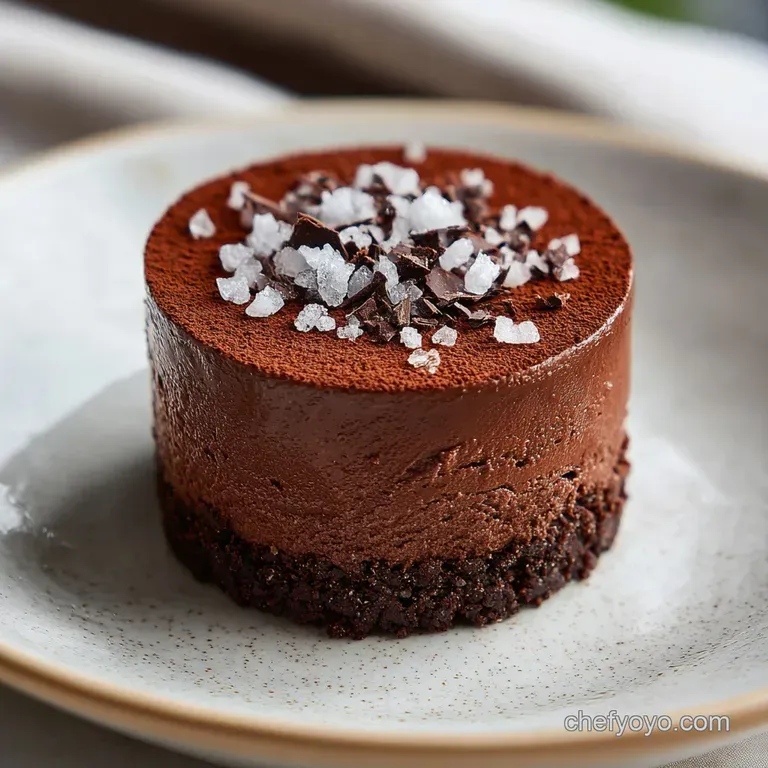
Sea Salt Chocolate Mousse Cake: Velvety and Rich
- Time:30 minutes active + 6 hours chilling = Total 6 hours 45 mins
- Flavor/Texture Hook: Shattering cocoa crust with a velvety, mahogany mousse
- Perfect for: Dinner party centerpieces or a high end date night at home
- Savor This Chocolate Dessert Recipe with Sea Salt
- Secrets of the Salted Chocolate Balance
- Component Analysis
- Selecting Your Elements
- Minimal Tools for Success
- Step by Step Preparation Guide
- Fixing Common Mousse Mistakes
- Customizing Your Chocolate Treat
- Long Term Storage Tips
- Best Pairings and Sides
- Recipe FAQs
- 📝 Recipe Card
Savor This Chocolate Dessert Recipe with Sea Salt
The smell of toasted cocoa and melted butter hits you the second that crust comes out of the oven. It's that nutty, warm aroma that makes your whole kitchen feel like a professional bakery. I remember the first time I tried making a mousse cake, and it was a complete disaster.
The mousse was rubbery, like a chocolate sponge, because I over whipped the yolks, and the crust was so soggy it just slid off the plate. I was honestly mortified.
But then I realized the secret isn't in expensive equipment, it's in the temperature and the fold. Once I stopped rushing the cooling process and learned how to actually fold cream without popping the bubbles, everything changed.
Now, this is the one I make when I want to impress someone without spending the whole day stressed out in the kitchen.
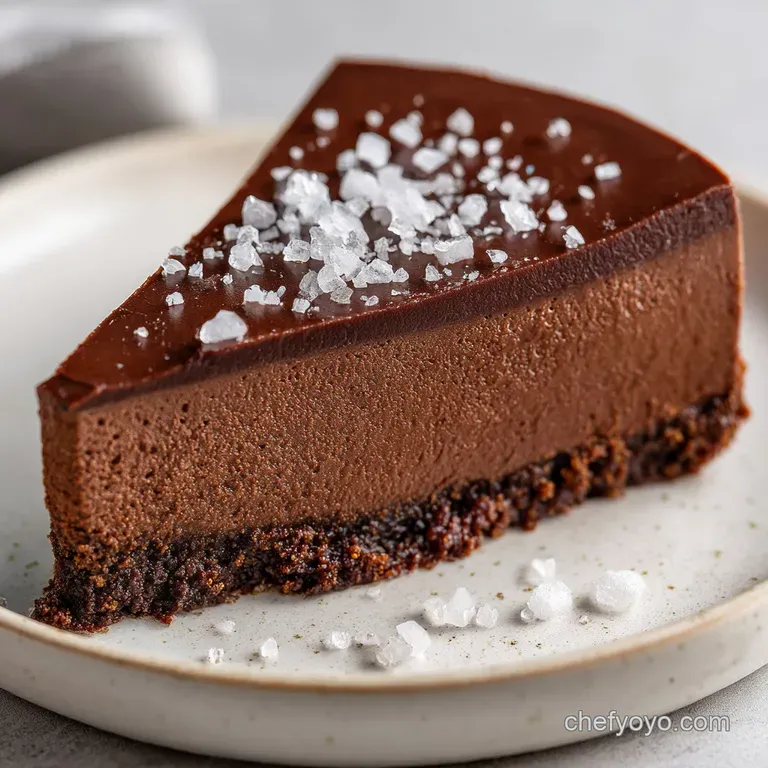
You can expect a dessert that hits every note. You've got the crunch of the wafer base, the silky weight of the dark chocolate, and then those little crystals of sea salt that just wake everything up. It's a bold, rustic treat that feels expensive but only uses a few basic bowls and a whisk.
Secrets of the Salted Chocolate Balance
To get this right, you need to understand how the ingredients interact. It's not just about mixing things together, it's about creating a stable structure that feels light on the tongue.
Fat Emulsion: Combining hot cream with chocolate creates a smooth, glossy liquid. This keeps the chocolate from feeling grainy or waxy.
Air Suspension: Whipping the cream introduces tiny air pockets. When we fold this into the dense chocolate, those pockets hold the structure up, creating that velvety mouthfeel.
Contrast Theory: Sea salt doesn't just make it "salty." It actually suppresses the bitterness of the dark chocolate while enhancing the perceived sweetness.
Thermal Setting: The 6 hour chill allows the cocoa butter to recrystallize. This is what turns a liquid cream into a sliceable cake. For more on this, my chocolate texture guide explains how temperature affects the final snap.
| Method | Time | Texture | Best For |
|---|---|---|---|
| Stovetop Base | 10 mins | Chewier, denser | Quick prep |
| Baked Base | 15 mins | Shattering, crisp | Classic feel |
| No Bake Mousse | 6 hours | Silky, airy | All occasions |
Component Analysis
Before we dive in, let's look at why these specific elements matter. Choosing the right cocoa percentage can change the whole vibe of the dish.
| Ingredient | Science Role | Pro Secret |
|---|---|---|
| Dark Chocolate (60%+) | Structural Base | Higher cocoa % means a firmer set |
| Egg Yolks | Emulsifier | Room temp yolks prevent the mix from seizing |
| Heavy Cream | Aerator | Keep the bowl chilled for maximum volume |
| Flaky Sea Salt | Flavor Enhancer | Add only at the end to keep the crystals intact |
Selecting Your Elements
I've found that using a higher quality dark chocolate makes a massive difference here. Don't bother with the chocolate chips meant for cookies, as they have stabilizers that stop them from melting smoothly. Go for a high-quality bar and chop it up yourself.
- 1 cup (100g) chocolate wafer crumbs Why this? Provides a deep, toasted flavor base (Sub: crushed Oreos)
- 1/2 cup (115g) unsalted butter, melted Why this? Binds the crust and adds richness (Sub: coconut oil)
- 2 tbsp (25g) cocoa powder Why this? Deepens the color and bitterness (Sub: espresso powder)
- 1 tbsp (12g) granulated sugar Why this? Balances the cocoa bitterness (Sub: maple syrup)
- 8 oz (225g) dark chocolate (60% cocoa or higher), chopped Why this? Creates the primary structure (Sub: semi sweet chocolate)
- 1 cup (240ml) heavy whipping cream, divided Why this? Adds fat for stability and air for lift (Sub: mascarpone for a denser feel)
- 3 large (150g) egg yolks, room temperature Why this? Thickens the cremeux (Sub: cornstarch slurry for egg free)
- 1/4 cup (50g) granulated sugar Why this? Sweetens the whipped cream (Sub: powdered sugar)
- 1 tsp (5ml) vanilla extract Why this? Rounds out the chocolate notes (Sub: almond extract)
- 1 tbsp (15g) flaky sea salt Why this? Cuts through the richness (Sub: coarse kosher salt)
- 2 tbsp (30ml) extra virgin olive oil (optional) Why this? Adds a peppery, fruity finish (Sub: melted butter)
| Original Ingredient | Substitute | Why It Works |
|---|---|---|
| Dark Chocolate (8 oz) | Semi Sweet Chocolate | Similar fat content. Note: Result will be sweeter and slightly softer |
| Chocolate Wafers | Graham Crackers | Similar crunch. Note: Lacks the deep cocoa flavor of wafers |
| Heavy Cream | Full fat Coconut Milk | Similar fat ratio. Note: Adds a tropical flavor and slightly different set |
Right then, before we move on, make sure your ingredients are ready. Having everything measured out means you won't panic when the chocolate is melting.
Minimal Tools for Success
You don't need a kitchen full of gadgets. In fact, using too many bowls just means more washing up. All you really need are a few basics.
First, get a 9 inch springform pan. This is non negotiable because you can't exactly flip a mousse cake upside down without it collapsing. You'll also need a heat proof bowl for the chocolate, which is where I usually use a glass or stainless steel one.
For the whipping part, a handheld electric mixer is fine, but if you're feeling old school, a balloon whisk works too, though your arm will feel it. Finally,, grab a rubber spatula.
This is the most important tool for the folding process, as it lets you scoop from the bottom without deflating the air you worked so hard to get in.
Step by step Preparation Guide
Let's crack on. Follow these steps closely, and pay attention to the visual cues. That's how you know the recipe is on track.
Phase 1: Building the Base
- Combine chocolate wafer crumbs, melted butter, cocoa powder, and sugar in a bowl. Mix until it looks like wet sand.
- Press the mixture firmly into the bottom of a 9 inch springform pan using the back of a spoon. Note: Press hard so it doesn't crumble when slicing.
- Bake at 350°F (175°C) for 8-10 minutes until the edges are set and the scent is nutty.
- Allow the cocoa base to cool completely before adding the filling. This is a critical checkpoint.
Phase 2: Creating the Chocolate Cremeux
- Place chopped dark chocolate in a heat proof bowl.
- Heat 1/2 cup (120ml) of heavy cream until it just begins to simmer, then pour it over the chocolate and let it sit for 2 minutes. Note: Don't boil the cream or you'll burn the chocolate.
- Whisk gently from the center outward until a glossy, mahogany colored emulsion forms.
- Whisk in the egg yolks and vanilla extract one by one until the mixture is smooth.
Phase 3: Folding for Volume
- In a separate chilled bowl, whip the remaining 1/2 cup (120ml) of heavy cream with sugar until soft peaks form.
- Gently fold the whipped cream into the chocolate cremeux using a rubber spatula to maintain air bubbles. Note: Use a "cut and fold" motion, not a stirring motion.
Phase 4: The Precision Chill and Finish
- Pour the mousse over the cooled cocoa base and refrigerate for 6 hours. This ensures the cake is firm enough to slice.
- Finish the cake with a sprinkle of flaky sea salt and an optional drizzle of extra virgin olive oil before serving.
Chef's Tip: If you want a more intense chocolate flavor, add a teaspoon of instant espresso powder to the melted butter in the base. It doesn't make it taste like coffee, it just makes the chocolate taste "darker."
Fixing Common Mousse Mistakes
Even the best of us hit a snag. The most common issue is a mousse that doesn't set or a crust that's too soft.
Why Your Mousse Deflates
If you stir too vigorously during the folding stage, you'll pop the air bubbles. This turns your airy mousse into a dense chocolate pudding. Use a spatula and be patient.
Why Your Base Is Soggy
This usually happens if you pour the mousse on while the crust is still warm. The warmth melts the fats in the mousse and seeps into the crust. Always wait for it to be room temperature.
| Problem | Root Cause | Solution |
|---|---|---|
| Grainy Mousse | Chocolate overheated | Use a double boiler or lower heat |
| Soft Peaks Missing | Cream too warm | Chill your mixing bowl in the freezer |
| Crust Crumbles | Not enough butter | Press more firmly into the pan |
Common Mistakes Checklist
- ✓ Pat the pan with butter before adding the crust to prevent sticking
- ✓ Ensure egg yolks are room temperature to avoid seizing the chocolate
- ✓ Use a rubber spatula for folding, not a whisk
- ✓ Chill for the full 6 hours; don't try to shortcut the setting time
Customizing Your Chocolate Treat
Once you've got the hang of the base recipe, you can start playing around. I love tweaking this depending on who I'm serving.
If you want a more "adult" version, try swapping the vanilla extract for a tablespoon of aged rum or Amaretto. The alcohol cuts through the fat and adds a sophisticated layer. For those who prefer something a bit more fruity, a layer of fresh raspberries between the crust and the mousse is a classic move.
For a different kind of chocolatey treat, you might enjoy these Chocolate Crinkle Cookies, which offer a different kind of texture contrast. If you're looking for something even more decadent, consider adding a layer of peanut butter swirl into the mousse before chilling.
Decision Shortcut:
- If you want a richer taste, do use 70% cocoa chocolate.
- If you want a lighter feel, do increase the whipped cream by 2 tablespoons.
- If you want a nuttier crust, do toast the wafer crumbs for 5 mins before mixing.
Long Term Storage Tips
This cake actually holds up surprisingly well in the fridge. Keep it in the springform pan or transfer it to a cake stand, but always cover it with plastic wrap. It'll stay fresh for about 3 to 4 days.
If you want to freeze it, you can. Just wrap the chilled cake tightly in foil. It'll last for about 2 months. When you're ready to eat it, move it to the fridge for 4 hours to thaw slowly. This prevents the mousse from "sweating" or separating.
To avoid waste, if you have leftover chocolate wafer crumbs or cocoa powder, don't toss them. Mix the crumbs into your morning yogurt or use the cocoa powder to make a quick chocolate syrup for pancakes. Even the leftover egg whites from the yolks can be whipped into a meringue or added to an omelet.
Best Pairings and Sides
Since this is a very rich dessert, you need something to balance it out. I usually serve this with a side of tart berries, like raspberries or blackberries. The acidity of the fruit cleanses the palate between bites of the dense chocolate.
A glass of cold milk is the classic choice, but if you're feeling fancy, a small glass of dessert wine or a strong espresso works perfectly. The bitterness of the coffee mirrors the dark chocolate and makes the sea salt pop even more.
Trust me on this, the olive oil drizzle might sound weird, but it adds a peppery note that transforms the dish into something you'd find in a high end bistro.
Recipe FAQs
Can I use milk chocolate instead of dark?
No, stick with dark chocolate (60% cocoa or higher). Milk chocolate has a higher sugar and milk fat content, which may prevent the mousse from setting firmly during the 6-hour refrigeration.
How to prevent the chocolate from seizing when adding cream?
Heat the heavy cream until it just begins to simmer. Pour it over the chopped chocolate and let it sit for 2 minutes before whisking from the center outward to create a smooth emulsion.
Is it true I can skip the 6-hour chilling time if I use a freezer?
No, this is a common misconception. Freezing can alter the texture of the cremeux, whereas a slow 6-hour refrigeration ensures a consistent, silky mouthfeel.
How to get a perfectly smooth base without gaps?
Press the crumb mixture firmly into the pan using the back of a spoon. Ensure the edges are tightly packed before baking at 350°F (175°C) for 8-10 minutes.
Can I substitute the flaky sea salt with table salt?
No, avoid using table salt. Flaky sea salt provides a targeted crunch and a cleaner salt profile that balances the rich dark chocolate without tasting overly salty.
Why did my mousse separate when folding in the whipped cream?
Use a rubber spatula to fold gently. Stirring too vigorously deflates the air bubbles and breaks the emulsion. If you enjoyed mastering this folding technique, see how the same principle creates lift in our vanilla sponge.
How to store leftovers?
Keep the dessert in an airtight container in the refrigerator. It will stay fresh for up to 3 days, though the crust may soften slightly over time.
Chocolate Dessert With Sea Salt

