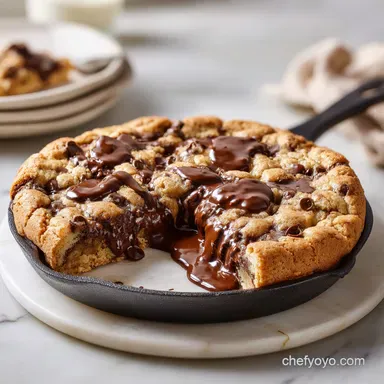
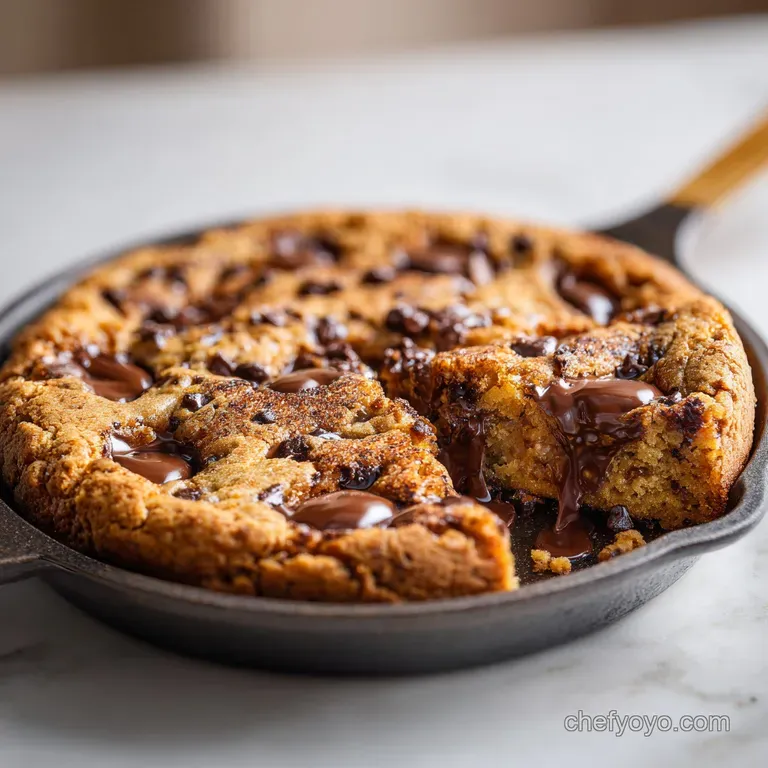
Chocolate Chip Skillet Cookie: Chewy and Golden
- Time:10 minutes active + 20 minutes baking = Total 30 minutes
- Flavor/Texture Hook: Deep mahogany brown edges with a soft, fudgy center
- Perfect for: Cozy date nights or an easy crowd pleaser dessert
The Best Chewy Chocolate Chip Skillet Cookie
That heavy, warm aroma of browning butter and melting semi sweet chocolate is enough to pull anyone into the kitchen. I remember one rainy Tuesday a few years back when the house felt freezing and the mood was low.
I didn't have the patience for individual scoops or the time to chill dough overnight, so I just dumped everything into my old Lodge cast iron skillet and slid it into the oven.
When it came out, the edges had this slight shatter to them, but the center was still a bit wobbly. We ended up eating it straight out of the pan with three different spoons, fighting over the gooey middle.
It wasn't about being a professional baker, it was just about that immediate, rustic comfort that only a warm pan can provide.
You can expect a dessert that bridges the gap between a classic cookie and a fudgy brownie. It's not a cake, and it's not a standard biscuit, it's something entirely its own. Trust me on this, once you start serving these in the skillet, you'll never go back to baking sheets.
The Magic Behind the Bake
I used to wonder why the pan made such a difference, but it really comes down to how the heat moves. Here is what's actually happening in your oven:
- Heat Retention: Cast iron absorbs heat and holds it, cooking the dough from the sides and the bottom simultaneously for a more even crust.
- Sugar Synergy: The high ratio of brown sugar keeps the center moist and adds a hint of molasses, preventing it from becoming dry.
- Fat Distribution: Using melted butter instead of creamed butter creates a denser, chewier structure rather than a fluffy, cake like lift.
- Controlled Spread: The walls of the skillet keep the dough contained, forcing it to thicken rather than spread thin across a tray.
Right then, before we get into the gear, let's look at how this method compares to the usual way of doing things.
| Method | Time | Texture | Best For |
|---|---|---|---|
| Cast Iron Skillet | 30 mins | Velvety center, crisp edge | Sharing, cozy vibes |
| Baking Sheet | 20 mins | Uniformly crisp/chewy | Lunchboxes, gifting |
| Oven to Table | 30 mins | Molten, underbaked feel | Immediate serving |
If you're looking to really understand the behavior of your ingredients, you might find my chocolate texture guide helpful for picking the right chips.
Picking Your Wholesome Elements
The beauty of this recipe is the simplicity. We aren't using fancy additives, just rustic, wholesome staples that do the heavy lifting. The quality of your butter and chocolate will really shine through here, so don't bother with the cheapest options if you can avoid it.
Component Analysis
| Ingredient | Science Role | Pro Secret |
|---|---|---|
| Unsalted Butter | Provides fat and flavor | Melt it, but let it cool so it doesn't scramble the egg |
| Brown Sugar | Adds moisture and chew | Pack it tightly into the cup for the right ratio |
| Baking Soda | Creates lift and browning | Sift it to avoid those tiny bitter clumps |
| Semi Sweet Chips | Adds structure and sweetness | Use a mix of chips and chopped bars for pools of chocolate |
The Full List
- 1/2 cup (115g) unsalted butter, melted and slightly cooled Why this? Creates a denser, chewier bite than creamed butter
- 3/4 cup (150g) packed brown sugar Why this? Adds deep molasses flavor and moisture
- 1/4 cup (50g) granulated white sugar Why this? Helps the edges get that shatter crisp texture
- 1 large egg, room temperature Why this? Emulsifies the fats and sugars for a smooth batter
- 1 tsp (5ml) pure vanilla extract Why this? Rounds out the sweetness with floral notes
- 1 1/2 cups (190g) all purpose flour Why this? Provides the necessary structure
- 1/2 tsp (3g) baking soda Why this? Reacts with brown sugar for a slight lift
- 1/2 tsp (3g) salt Why this? Cuts through the sugar for a balanced taste
- 1 cup (170g) semi sweet chocolate chips Why this? High cocoa content prevents it from being cloying
Smart Substitutions
| Original Ingredient | Substitute | Why It Works |
|---|---|---|
| Unsalted Butter | Coconut Oil (melted) | Similar fat content. Note: Adds a slight tropical flavor |
| All Purpose Flour | Almond Flour | gluten-free option. Note: Results in a denser, grainier crumb |
| Semi Sweet Chips | Dark Chocolate (70%) | Higher cocoa. Note: Less sweet, more intense chocolate profile |
| Brown Sugar | Coconut Sugar | Similar moisture. Note: Adds a more caramel like, earthy taste |
Essential Gear for the Job
You don't need a kitchen full of gadgets for this, but there are a few things that make the process smoother. A heavy bottomed bowl is great because it doesn't heat up too fast when you're mixing in the melted butter.
The star of the show is, obviously, the cast iron skillet. I recommend an 8 inch or 10 inch pan. If you go too large, your cookie will be thin and overbake quickly. If you go too small, the center might stay raw while the edges burn.
A sturdy spatula is also a must for pressing the dough into the corners without fighting with it.
Since we are skipping the stand mixer, a simple whisk will do. I actually prefer whisking by hand for this recipe, it gives you a better feel for the texture of the sugars and butter, ensuring there are no stubborn lumps of brown sugar hiding in the batter.
Step-by-step Baking Guide

Let's crack on. The flow here is all about not overworking the flour, which is the secret to keeping it from becoming a giant biscuit.
- Preheat the oven to 350°F (175°C) and lightly grease an 8 inch or 10 inch cast iron skillet with butter or non stick oil. Note: A greased pan ensures the edges slide off easily
- In a large bowl, whisk together the melted butter, brown sugar, and white sugar until the mixture resembles wet sand and no large lumps remain.
- Stir in the egg and vanilla extract until the batter becomes glossy and smooth.
- Sift in the flour, baking soda, and salt.
- Use a spatula to fold the dry ingredients into the wet batter, stopping as soon as no white streaks of flour are visible. Note: Overmixing creates too much gluten, making the cookie tough
- Gently fold in the semi sweet chocolate chips.
- Press the dough evenly into the prepared cast iron skillet using a spatula.
- Bake for 20 minutes until the edges are deep mahogany brown and pulling away from the sides, while the center still has a slight jiggle.
- The Mix
- The batter should be glossy and thick, not runny or dry.
- The Temp
- Ensure the oven is fully preheated to 350°F before the pan goes in.
- The Pull
- At 20 minutes, the edges should clearly be separating from the pan wall.
Fixing Common Cookie Glitches
Even for those of us who live in the kitchen, things sometimes go sideways. Usually, it's a temperature issue or a measurement mishap.
The Center Stays Raw
If your edges are burnt but the middle is liquid, your oven might be running too hot, or your skillet is too small for the amount of dough. This often happens with very deep skillets where the heat can't reach the center as effectively.
The Texture is Too Cakey
This usually happens if you use too much flour or overmix the batter. When you stir too much, you develop the gluten, which creates a bread like structure instead of a fudgy, dense cookie.
Troubleshooting Guide
| Problem | Root Cause | Solution |
|---|---|---|
| Burning Edges | Oven temp too high | Lower temp by 25°F and bake 5 mins longer |
| Flat/Thin Cookie | Butter was too hot | Let melted butter cool to room temp before mixing |
| Grainy Texture | Sugar not incorporated | Whisk sugars and butter longer until smooth |
Common Mistakes Checklist
- ✓ Measure flour by spooning it into the cup rather than scooping.
- ✓ Use a room temperature egg to prevent the butter from seizing.
- ✓ Avoid overmixing once the flour is added.
- ✓ Let the cookie rest in the pan for 5-10 minutes before scooping.
- ✓ Grease the sides of the pan, not just the bottom.
Creative Twists and Swaps
While the classic is hard to beat, I love playing with the toppings. If you want a real treat, try adding a swirl of peanut butter on top before baking. It reminds me of my Buckeye Candy recipe, combining that salty nuttiness with the rich chocolate.
For those who want a "Loaded" version, you can press in handfuls of pecans or walnuts. I've also found that a sprinkle of flaky sea salt on top immediately after taking it out of the oven transforms the flavor profile from "sweet" to "sophisticated".
- For Two
- Half the recipe and use a 6 inch skillet or a small oven safe ramekin.
- Dark Chocolate
- Swap semi sweet chips for 70% cocoa chunks for a more bitter, adult taste.
- The Nutty Version
- Add 1/2 cup of toasted hazelnuts for an earthy crunch.
Storage and Waste Tips
If you happen to have leftovers (which is rare in my house), you can store the cookie right in the skillet. Just cover it tightly with foil and keep it in the fridge for up to 3 days.
For reheating, don't use the microwave if you can help it, as it can make the cookie rubbery. Instead, pop the skillet back into a 300°F oven for about 5 minutes. It'll bring back that velvety center and the crisp edges.
- The Pan
- Once you've eaten the cookie, don't wash the skillet immediately. Use the leftover butter and sugar residue to fry a couple of eggs the next morning for a sweet and salty breakfast.
- Chocolate Scraps
- If you have broken pieces of chocolate bars, chop them up and use them instead of chips for "pools" of chocolate.
- Butter Residue
- Use a silicone spatula to scrape every bit of batter from the bowl to avoid wasting any of that rich dough.
Serving and Enjoyment Guide
The real magic happens the second it comes out of the oven. The best way to serve this is while it's still steaming. Place a massive scoop of cold vanilla bean ice cream right in the center. The contrast between the freezing ice cream and the molten cookie is what makes this a top tier dessert.
If you're serving a crowd, provide several spoons and let everyone dive in. It's a rustic, communal experience that feels much more intimate than handing out individual plates.
For a more "plated" feel, slice the cookie into wedges like a cake. Serve each wedge with a dollop of whipped cream and a few fresh raspberries to add a bit of acidity to the richness. Honestly, don't even bother with fancy plating if you're at home, the cast iron pan is the best presentation there is.
Recipe FAQs
Can I use milk chocolate chips instead of semi sweet?
Yes, you can. The resulting cookie will be significantly sweeter and creamier. If you enjoy experimenting with chocolate combinations, you might like making chocolate turtles.
Why did my skillet cookie turn out too cakey?
You likely overmixed the batter. Once the flour is added, fold it in only until the white streaks disappear to avoid developing too much gluten.
How do I know when the skillet cookie is perfectly done?
Look for mahogany brown edges pulling away from the skillet. The center should still have a slight jiggle to ensure it stays gooey after cooling.
Is it true I must use a cast iron skillet for this recipe?
No, this is a common misconception. While cast iron provides the best heat distribution, any oven safe pan or skillet will work if it is properly greased.
How to reheat leftover skillet cookie?
Place the skillet in a 300°F oven for about 5 minutes. This method restores the velvety center and crisp edges without making the dough rubbery.
How long does the cookie stay fresh in the skillet?
Up to 3 days in the refrigerator. Cover the skillet tightly with foil to keep the moisture in and prevent the edges from hardening.
How to prevent the cookie from sticking to the pan?
Lightly grease the 8 inch or 10 inch skillet with butter or non-stick oil. A well greased pan ensures the edges slide off easily during serving.
Chocolate Chip Skillet Cookie