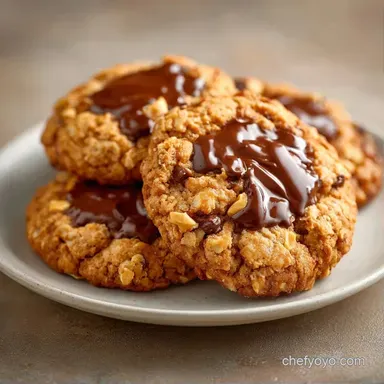
Chocolate Peanut Butter Oats: Chewy Cookies
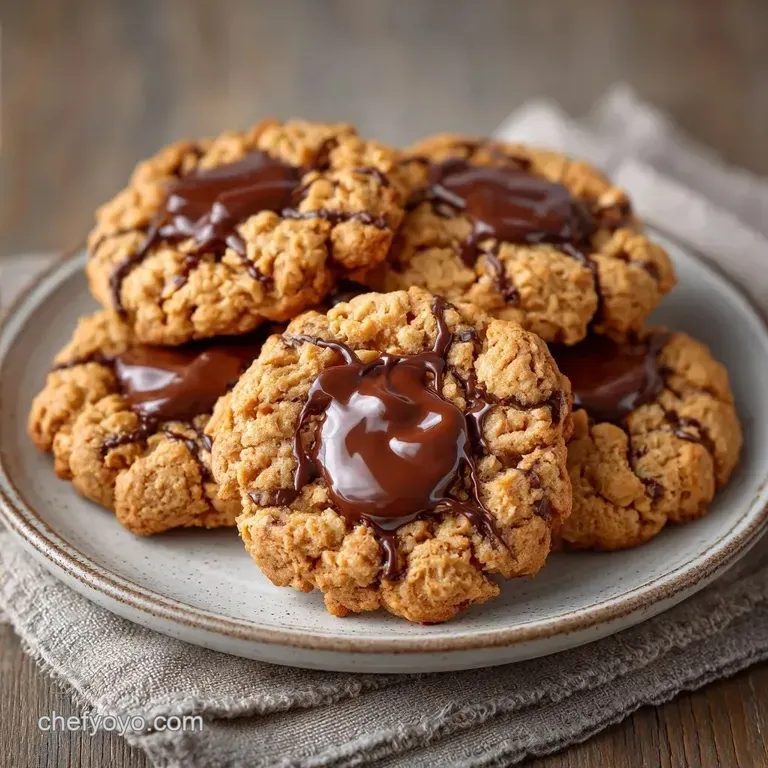
- Time: 10 min active + 10 min baking
- Flavor/Texture Hook: Chewy, salty sweet with melted chocolate pools
- Perfect for: Quick afternoon treats or easy lunchbox additions
The smell of toasted oats and melted chocolate hitting a hot oven is probably my favorite scent in the world. I remember the first time I tried making these, I left them in for just two minutes too long. They looked fine when they came out, but once they cooled, they were hard as rocks.
I learned the hard way that with this specific dough, "slightly underdone" is actually the goal.
You want those edges to be just barely golden while the center still looks like it might be raw. That is the secret to that soft, bendy texture we all want. This version of Chocolate Peanut Butter Oats is all about the balance between the richness of the peanut butter and the heartiness of the rolled oats.
If you're looking for a quick win, this is it. You don't need a fancy stand mixer (though it helps), and you can have a batch of these ready before your coffee even cools down. It is a straightforward process that gives you a high end result without the fuss.
Easy Chocolate Peanut Butter Oats
The beauty of this recipe is the texture. By using old fashioned rolled oats instead of quick oats, you get a rustic, hearty bite that holds up against the heavy peanut butter. When you combine them with semi sweet chocolate, you get a snack that feels substantial but still tastes like a treat.
Most people overthink the mixing process. They stir until the dough is perfectly smooth, but that actually develops too much gluten in the small amount of flour we use. I've found that folding the oats and chips in by hand keeps the cookies light.
If you overmix, you end up with something more like a muffin than a cookie.
Since we are using a high ratio of fat from both the butter and the peanut butter, these cookies can spread if your kitchen is too warm. If your butter is too soft, the cookies will flatten into pancakes. Trust me on this: keep an eye on your butter temperature.
Why This Recipe Works
Fat Emulsification: Beating the butter, peanut butter, and sugar together creates tiny air pockets. This ensures the cookies rise slightly and don't turn into dense discs.
Oat Hydration: The rolled oats absorb some of the moisture from the egg and butter during the short rest. This prevents the cookies from being too greasy and gives them a chewy structure.
Sugar Caramelization: Brown sugar contains molasses, which attracts moisture. According to King Arthur Baking, this is why brown sugar creates a much chewier texture than white sugar.
Leavening Balance: The baking soda reacts with the slight acidity in the brown sugar. This creates the lift needed to support the heavy chocolate chips and oats.
| Texture Goal | Butter Temp | Mixing Method | Result |
|---|---|---|---|
| Ultra Chewy | Softened (not melted) | Hand fold oats | Thick, bendy cookies |
| Crisp Edges | Slightly Chilled | High speed cream | Shatter crisp rim |
| Cakey | Melted Butter | Over beaten flour | Soft, bread like bite |
Essential Recipe Specs
The timeline for this recipe is incredibly tight, which is why I love it. We aren't waiting hours for dough to chill or doing complex tempering. It is a straight line from the pantry to the oven.
First, we have the prep flow. You'll spend about 10 minutes gathering ingredients and mixing the batter. Then, there is a quick 10 minute bake. In total, you are looking at 20 minutes from start to finish.
For the best results, I recommend using a standard baking sheet with parchment paper. This prevents the bottoms from burning and makes cleanup a breeze. If you don't have parchment, a light grease with butter works, but the parchment is what gives you those clean, professional edges.
The Ingredient Deep Dive
Not all ingredients are created equal in this recipe. The type of peanut butter you choose can actually change the structure of the cookie. Natural peanut butter (the kind you have to stir) tends to make the cookies spread more because the oil separates.
| Ingredient | Science Role | Pro Secret |
|---|---|---|
| Brown Sugar | Moisture & Color | Pack it tightly for a denser, chewier center |
| Rolled Oats | Structural Bulk | Use "Old Fashioned" for a rustic, nutty texture |
| Baking Soda | Lift/Leavening | Sift with flour to avoid bitter clumps |
| Peanut Butter | Fat & Flavor | Use a stabilized brand for more consistent height |
Tools You Will Need
You don't need a professional kitchen for this. A simple set of mixing bowls and a whisk or hand mixer will do the trick. If you have a stand mixer, use it for the creaming phase to save your arms.
I highly suggest using a cookie scoop. It might seem like an extra step, but it ensures every cookie is the same size. When cookies vary in size, the small ones burn while the big ones stay raw in the middle.
Finally,, grab some parchment paper. It's far better than greasing the pan because it provides a non stick barrier that handles the high sugar content of these cookies without scorching.
From Prep to Plate
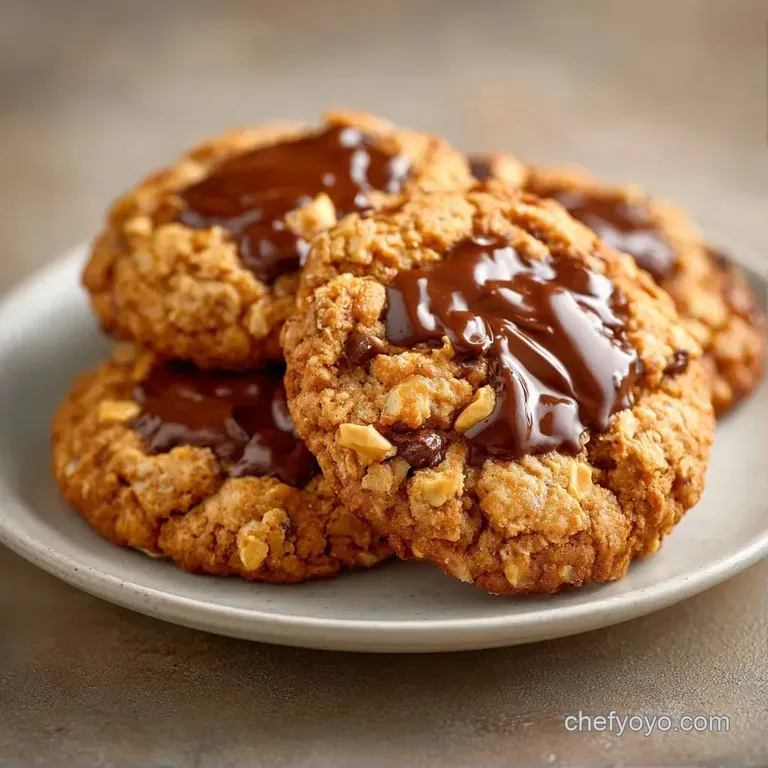
Right then, let's get into the actual making. I've broken this down into phases so you can manage your workflow.
Phase 1: Creaming the Base
Start by beating your softened butter, creamy peanut butter, and packed brown sugar. Use medium high speed for about 2 to 3 minutes. You are looking for the mixture to turn pale and fluffy. This is the most important part for the texture.
Once that is fluffy, add in your room temperature egg and vanilla extract. Beat them in until the mixture is fully emulsified. If it looks slightly curdled, just keep beating for another 30 seconds.
Phase 2: Folding in Texture
Lower your mixer speed to the lowest setting. Stir in the flour, baking soda, and salt. Stop the moment you don't see any more white streaks of flour. Overmixing here is where the "cakey" problem starts.
Now, put the mixer away. Use a spatula to fold in the rolled oats and chocolate chips by hand. This ensures the oats are distributed evenly without crushing them or overworking the dough.
Phase 3: The Bake
Preheat your oven to 350°F (175°C). Scoop rounded tablespoons of dough onto your parchment lined sheets. Space them about 2 inches apart because they will spread.
Bake for 9 to 11 minutes. This is the danger zone. Pull them out when the edges are golden brown but the centers still look a bit soft and underbaked. They will firm up on the hot pan.
Tips and Common Pitfalls
One mistake I made early on was using cold eggs. Cold eggs can seize the butter in the creamed mixture, causing the dough to break. To fix this, put your egg in a bowl of warm water for 5 minutes before cracking it.
Another common issue is the "flat cookie" syndrome. This usually happens if your butter was too warm or if you used a very oily natural peanut butter. If your dough feels too soft to hold a shape, pop it in the fridge for 15 minutes before scooping.
Chef's Note: For a deeper flavor, try browning your butter in a pan first. Just make sure to let it solidify back to a soft state before creaming it with the peanut butter.
Why Your Cookies Spread
If your cookies are merging into one giant sheet, it's likely a temperature issue. Either the oven wasn't fully preheated, or the butter was too melted.
| Problem | Root Cause | Solution |
|---|---|---|
| Flat Cookies | Butter too warm | Chill dough for 15 mins |
| Dry Texture | Too much flour | Use a scale for precise grams |
| Burnt Bottoms | Oven rack too low | Move rack to the center position |
Quick Fix Checklist:
- ✓ Butter is soft but still holds a fingerprint
- ✓ Eggs are room temperature
- ✓ Oats are "Old Fashioned," not "Quick" or "Instant"
- ✓ Cookies removed while centers look soft
- ✓ Baking sheet is completely cool before adding new dough
Fun Flavor Variations
If you want to switch things up, these Chocolate Peanut Butter Oats are a great base for other flavors. For a "Power Ball" version, you can skip the baking entirely by using honey instead of sugar and omitting the egg and flour. Just mix and roll into balls.
If you prefer a heartier format, press the dough into a square pan and bake for 20 minutes. This turns them into bars, which are easier to pack for trips. For a healthy twist, you can swap the all purpose flour for almond flour, though they will be more fragile.
For those who love a little extra kick, add a pinch of cinnamon or a teaspoon of espresso powder to the flour. The espresso doesn't make them taste like coffee; it just makes the chocolate taste more intense. If you're craving something creamy on the side, a glass of homemade almond milk is the perfect companion.
Adjusting the Batch Size
Scaling this recipe is pretty easy, but you can't just double everything blindly. When making a double batch of these Peanut Butter Oats, I find that the leavening doesn't need to be doubled fully. Use 1.5x the baking soda and salt instead of 2x to avoid a metallic taste.
If you are cutting the recipe in half, you'll run into the "half egg" problem. The best way to handle this is to crack one egg into a small bowl, whisk it well, and then measure out exactly 2 tablespoons.
For larger batches, work in stages. Don't try to cram 48 cookies onto one tray. Overcrowding the oven can drop the temperature, which leads to more spreading and less browning.
Baking Truths
Some people think you have to chill cookie dough overnight to get a better flavor. While that's true for some high end recipes, these Chocolate Peanut Butter Oats are designed for speed. The flavor is already quite bold due to the peanut butter and brown sugar, so the wait isn't necessary.
Another myth is that you need a professional convection oven for that golden edge. A standard oven works just fine as long as you don't open the door every two minutes to peek. Every time you open the door, you lose about 25 degrees of heat.
Finally, some believe that "healthy" oats mean using instant oats. In reality, instant oats are pre processed and thin, which ruins the chewiness. Stick to the rolled variety for the best results.
Storage and Leftovers
These cookies stay fresh in an airtight container at room temperature for about 4 to 5 days. If you live in a very humid area, the sugar might attract moisture, making them sticky. In that case, keep them in the fridge.
For long term storage, you can freeze them. I recommend freezing the balls of raw dough on a tray first, then transferring them to a freezer bag. You can bake them straight from the freezer; just add 2 minutes to the baking time.
To avoid waste, if you have a bit of dough left that isn't enough for a full cookie, just press it into a muffin tin for a single "cookie cup." It's a great way to use up the scraps. If you're in the mood for something similar but different, my Greek yogurt cookie dough is another great treat that doesn't require a long bake.
The Best Pairing Ideas
Since these are quite rich, you want something to cut through the fat of the peanut butter. A cold glass of skim or whole milk is the classic choice, but a hot cup of black tea also works brilliantly.
If you're serving these for a brunch or a party, try pairing them with fresh raspberries or sliced strawberries. The acidity of the berries balances the sweetness of the chocolate.
For a more decadent experience, serve them warm with a small scoop of vanilla bean ice cream. The heat from the Chocolate Peanut Butter Oats will melt the ice cream slightly, creating a velvety sauce that coats the oats.
Recipe FAQs
Why did my cookies come out flat?
Chill the dough for 15 minutes. This usually happens if the butter was too warm or if you used a very oily natural peanut butter.
How should I store these cookies?
Keep them in an airtight container. They stay fresh at room temperature for 4 to 5 days, though the fridge is better in humid climates to prevent stickiness.
Why is it important to use room temperature eggs?
Use room temperature eggs to prevent the butter from seizing. Cold eggs can cause the creamed mixture to break, ruining the emulsion of the dough.
How to freeze the dough for later?
Freeze the dough balls on a tray first. Once solid, transfer them to a freezer bag and add 2 minutes to the baking time when cooking from frozen.
Is it true I must bake the cookies until the centers are fully firm?
No, this is a common misconception. Remove them when the edges are golden brown but the centers still look slightly soft to ensure a chewy texture.
How to ensure the dough has the right fluffy consistency?
Beat the butter, peanut butter, and brown sugar on medium high speed for 2 3 minutes. This creates a pale, aerated base before you emulsify the egg and vanilla.
Can I serve these with other homemade sweets?
Yes, they make a great variety platter. For a contrasting texture, pair these chewy oats with some fudgy chocolate crinkle cookies.
Chocolate Peanut Butter Oats