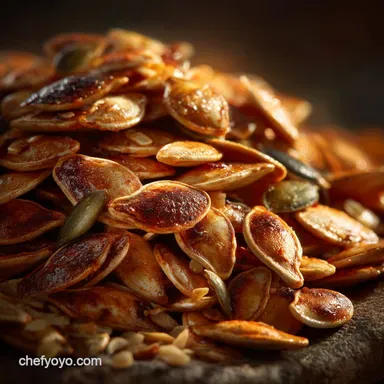
Crispy Golden Goodness Chefs Perfect Roasted Pumpkin Seeds

The Chef's Secret to Perfect Roasted Pumpkin Seeds
Autumn means pumpkins, and whether you're carving or cooking, the reward is a glorious byproduct: the raw seed. Transforming those sticky, slimy morsels into the ultimate Roasted Pumpkin Seeds is one of the season's greatest culinary triumphs.
But let’s be honest: many attempts result in a batch that’s disappointingly soft or chewy. Achieving that perfect, brittle crispness requires acknowledging one simple truth: the roasting process is easy; the preparation is paramount.
This definitive roasted pumpkin seeds recipe ensures you get that satisfying crunch every single time.
Why Most Homemade Seeds End Up Chewy
The enemy of a crunchy seed is moisture. When scooped from the pumpkin, the seeds are coated in a thick, sticky, fibrous layer of pulp. This pulp holds an incredible amount of water.
If the seeds or even microscopic bits of the pulp are introduced to the hot oven while still damp, they won't roast; they will steam. Steaming leads directly to a sad, rubbery texture instead of the deep golden brown brittle shell we crave.
Our focus must be on cleaning and drying until they are entirely slick- and moisture free.
Deconstructing the Myth of 'Easy' Roasting
While the technical cooking skill required for this dish is minimal, classifying it as one of the truly Easy Dishes can be misleading. Yes, the oven time is only 15 to 20 minutes, requiring just one stir.
However, the mandatory preparatory phase the scrubbing and the passive drying time takes over an hour. This recipe is simple in execution but demands patience. Trust me, the 75 minutes spent ensuring dryness is the difference between an acceptable seed and an absolutely addictive Crunchy Snack .
What is a Pepita, Anyway?
The term "pepita" often causes confusion. Technically, pepita is the culinary term for a pumpkin seed that has been hulled meaning the outer white shell is removed, leaving the small, flat green seed inside. Our goal here, however, is to utilize the entire seed, shell and all.
This comprehensive guide focuses on the preparation and perfection of roasted pumpkin seeds with shell , maximizing that delicious nutty flavor and fiber content, and providing the substantial "pop" when you bite into them.
Essential Gear and Pantry Staples
A great recipe starts with setting yourself up for success. We require very few specialized tools, but the correct application of heat and minimal ingredients is vital for optimal texture and flavor adherence.
Identifying the Right Kitchen Tools for Crispness
The most crucial piece of equipment is a large, sturdy baking sheet. When roasting, spreading the seeds into a single, uncrowded layer is essential for maximizing surface area exposure to the dry heat.
Lining the sheet with parchment paper or a silicone mat prevents sticking and helps facilitate the easy stirring required halfway through the cooking process. You will also need large quantities of absorbent kitchen towels or paper towels for the critical drying phase.
Optimal Oil Choices for High Heat Roasting
Oil serves two functions in this roasted pumpkin seeds recipe : it conducts heat to the seed's surface, promoting crispness, and it acts as the vehicle for the salt and seasonings, ensuring they stick to the smooth shell.
We use about two tablespoons of a neutral oil, such as standard olive oil, avocado oil, or even melted unsalted butter. These oils have a high enough smoke point to handle the 300°F oven temperature without imparting any bitterness.
Salt Ratios: Achieving Flavor Without Drying the Seed
Salt is deployed strategically. First, a tablespoon of fine sea salt is added to the warm water bath during cleaning; this aids in dissolving the slimy pulp and begins the essential process of pre-seasoning the shell.
Second, a final dusting of only about half a teaspoon of fine sea salt is applied during the roasted pumpkin seeds seasoning step. We use fine salt because it adheres better than coarse salt. Avoid oversalting, which can wick too much moisture out too quickly and make the shell brittle or powdery.
The Crucial Pre-Roast Preparation Steps
The time spent here is non-negotiable and determines the outcome. Do not skip or rush these initial stages.
The Sticky Problem: Separating Pulp from Seed
After scooping the seeds and accompanying fibrous strings into a large bowl, the battle against the slime begins. Fill the bowl with warm water and introduce that first tablespoon of salt. Vigorously rub the seeds between your hands.
The combination of warm water and salt helps dissolve the gluey proteins that bind the pulp to the seeds. If the pulp is exceptionally stubborn as it often is with carving pumpkins the chef’s trick is to bring the seeds and salted water to a low simmer for about five minutes.
This denatures the proteins instantly, allowing the pulp to slide right off. Rinse them thoroughly in a colander under cold water until they are completely slick free.
The Essential Brine Soak Technique
While not a true brine, the initial soak and simmer in salted water serve as an internal seasoning step. This allows a slight salinity to penetrate the porous shell, seasoning the seed from the inside out and enhancing the natural nutty flavor.
This preliminary step is key to a complex flavor profile that isn't just salty on the exterior.
The Drying Mandate: Why Humidity is the Enemy
This is the secret weapon for obtaining superior crunch. After rinsing, spread the seeds onto a thick layer of kitchen towels and pat them down until they are visibly dry. Then, transfer them to a fresh, dry surface and allow them to air dry passively for 45 to 60 minutes.
They must look matte, not shiny or wet. If the seeds still feel tacky, they will simply steam in the oven, preventing that lovely, brittle transformation.
Related Recipes Worth Trying
- Cracking Good oven roasted Garlic Cabbage Steaks with Lemon Drizzle — Forget boiled cabbage These oven roasted Garlic Cabbage Steaks caramelise into nutty perfection They are healthy easy and a brilliant Keto Cabbage Steaks...
- The Best oven roasted Brussels Sprouts Recipe Crispy Savoury — Forget soggy greens This simple Brussels Sprouts recipe delivers crispy restaurantstyle flavour with a quick garlic glaze Your new favourite side dish
- Easy Crockpot Pumpkin Chili Recipe with Smoky Depth — This Slow Cooker Pumpkin Chili is pure autumn comfortrich smoky and unbelievably easy to make Perfect for a cosy night in Get the foolproof recipe now
Achieving the Golden Crunch: Roasting Methodology
Once fully dried, we are ready for the roasting phase, which is quick and straightforward.
Tossing and Seasoning the Dry Seeds
Transfer your fully dried seeds to a clean bowl. Drizzle with the two tablespoons of oil and toss thoroughly until every seed has a light, even coat. Then, sprinkle with the final half teaspoon of salt and a quarter teaspoon of black pepper, tossing again.
This oil coating is vital for uniform color development and adherence of the roasted pumpkin seeds seasoning .
Monitoring the Temperature for Even Cooking
Preheat your oven to a moderate 300°F (150°C). This low-and-slow approach guarantees that the seeds dry out fully before the shell burns. Spread the seasoned seeds onto the prepared baking sheet in a single layer crowding the pan is a mistake that causes uneven cooking.
Roast for 15 minutes, then give the pan a thorough stir to flip the seeds and ensure both sides are toasted. Continue roasting for 5 to 10 minutes more.
Know When They're Done: Visual and Auditory Cues
Perfectly done seeds will change from pale white to a deep golden brown. But the real test is auditory: listen for the rattle. When you stir them, fully crisp seeds will sound like dry pebbles hitting the metal pan, not soft, dull thuds. Remove them immediately.
If they still feel slightly springy, return them for another three to five minutes. Allow the Roasted Pumpkin Seeds to cool completely on the baking sheet; they will crisp up considerably as the residual heat dissipates.
Flavor Variations for Your Roasted Pumpkin Seeds
The standard salt and oil recipe is fantastic, but part of the fun of making these Fall Snacks is experimenting with flavor profiles.
Sweet Cinnamon Sugar Dusting
For a truly autumnal treat, you can pivot to a sweet coating. Instead of olive oil, use two tablespoons of melted coconut oil when tossing. After the seeds have finished roasting and are cooling slightly, toss them with a mixture of one teaspoon of cinnamon, half a teaspoon of nutmeg, and two tablespoons of light brown sugar.
The sugar will stick to the oil residue and create a delicious, crystallized coating.
Spicy Chili Lime Coatings (The Mexican Angle)
If you crave a kick, use one teaspoon of smoked paprika, half a teaspoon of chili powder, and a quarter teaspoon of garlic powder alongside the salt and oil. Once the seeds are removed from the oven, toss them immediately with the zest of one lime for a bright, acidic finish.
Savory Herb and Parmesan Mix
To create an elevated garnish for soups or salads, replace the standard seasoning mix with one tablespoon of 'Everything Bagel' seasoning. Alternatively, toss the oil-coated seeds with a quarter cup of finely grated Parmesan cheese, dried oregano, and garlic powder before roasting.
The Parmesan will crisp up beautifully and provide a savory crust.
Troubleshooting Common Roasting Mistakes
My Seeds Are Still Chewy: A Quick Fix
If you followed the preparation steps but still ended up with slightly chewy seeds, it means a small amount of residual moisture remained trapped within the shell. Don't panic! This is easily salvaged. Return the seeds to the oven and increase the temperature to 350°F (175°C).
Roast for just three more minutes, watching them constantly to prevent burning. If you have a counter top appliance, a quick blast using the roasted pumpkin seeds air fryer method at 350°F for 2 minutes also achieves a rapid final crisp.
Nutritional Breakdown and Serving Suggestions
Beyond being a delightful Crunchy Snack , roasted pumpkin seeds nutrition is impressive. A quarter cup serving delivers around 200 calories, offering about 8 10 grams of protein and healthy fats, making them a dense and satisfying option.
Serve them crumbled over a hearty winter salad, tossed into homemade trail mix alongside dried cranberries, or, my personal favorite, sprinkled generously atop a creamy butternut squash soup for texture contrast.
Best Practices for Long Term Storage
Once completely cooled, store your Roasted Pumpkin Seeds in an airtight container at room temperature. They will remain fresh and crunchy for up to two weeks. If you notice they begin to soften after a few days (especially in humid environments), simply spread them back onto a baking sheet and toast them again at 300°F for five minutes to restore their desirable crispness.
Recipe FAQs
My seeds came out chewy, not crispy. What did I do wrong?
The culprit is almost always moisture. It’s vital to banish every speck of goo and water before roasting; this is where most beginners go wrong. Pat them dry vigorously with absorbent kitchen roll, and then let them air dry for the full 45 minutes to an hour.
If they are damp, they will steam in the oven instead of crisping up nicely that’s the difference between a sad flop and a proper, satisfying crunch.
I've made a massive batch! How should I store them so they stay crunchy?
Jolly good effort! Once they are completely cool and I mean absolutely stone cold transfer your Roasted Pumpkin Seeds to an airtight container immediately. Keep them tucked away in a cool, dark larder or pantry, far away from any humidity.
Properly stored, they'll maintain their superb crunch for about 1 to 2 weeks, perfect for nibbling on or using as a quick garnish.
Are there any easy ways to jazz up my plain salt and pepper Roasted Pumpkin Seeds?
Absolutely! Think of the basic recipe as your blank canvas. For a festive autumnal flavour, try mixing them with cinnamon, a pinch of cloves, and brown sugar after they are finished roasting.
If you fancy something savoury, toss them with a teaspoon of smoked paprika, garlic powder, and a dash of Worcestershire sauce mixed in with the oil before they go into the oven delicious!
I’m a bit confused do I eat the whole seed, shell and all?
Yes, you tuck right in! Seeds fresh from a carving pumpkin are typically meant to be eaten shell-on. Roasting makes the shells brittle, palatable, and rich in beneficial nutrients and dietary fibre.
The shell also provides the structure that gives you that fantastic, noisy crunch so don't worry about shelling them before you enjoy this seasonal treat!
Why do we roast them so low and slow at only 300°F (150°C)? Can I speed the cooking up?
We use a moderate temperature to ensure the seeds dry out fully and cook evenly all the way through before the shells scorch. Cranking the heat too high (say, to 400°F) will likely result in burnt outsides and chewy, unappetizing insides.
Patience is a virtue here; roasting gently for 15-20 minutes guarantees that deep golden colour and perfect brittle texture.
Crispy Roasted Pumpkin Seeds Recipe