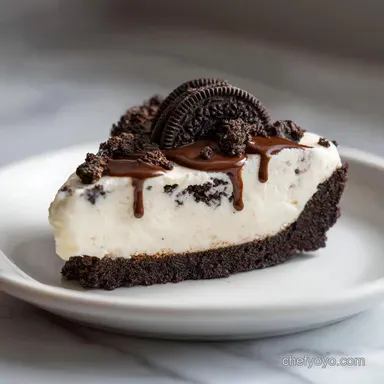
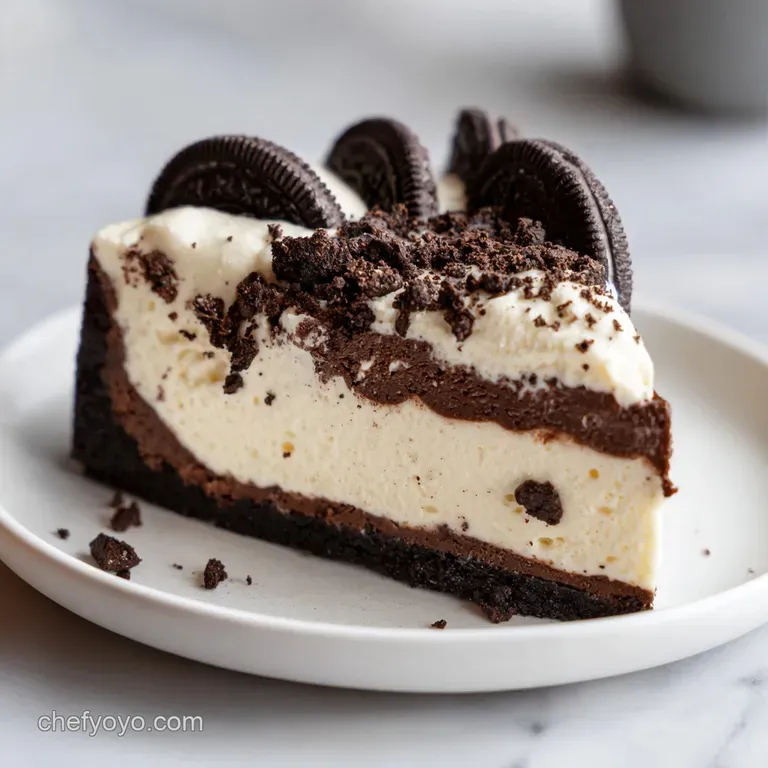
No Bake Oreo Pie: Silky and Rich
- Time:20 minutes active + 6 hours chilling = Total 6 hours 20 mins
- Flavor/Texture Hook: Shattering chocolate crust with a silky, cloud like center
- Perfect for: Last minute party desserts or beginner friendly treat nights
- Forget Ovens for no bake oreo pie
- Essential Quick Recipe Specs
- The Ingredient Deep Dive
- Minimal Tools Needed
- Steps from Prep to Plate
- Solving Common Pie Problems
- Easy Dietary Adaptations
- Scaling Your Pie
- Truths About No Bake Desserts
- Storage and Zero Waste
- Pro Presentation Tips
- Recipe FAQs
- 📝 Recipe Card
Forget Ovens for no bake oreo pie
The smell of crushed chocolate cookies and melted butter is enough to make anyone's mouth water, but there is a common myth that you need gelatin or a hot oven to get a dessert that actually holds its shape.
I used to think that "no bake" meant "mushy," and I spent way too long looking for stabilizers that would keep a slice from sliding off the plate.
Trust me on this, you don't need those additives. The secret is actually in the temperature of your ingredients and the way the fats in the cream cheese and heavy cream lock together when chilled.
Once you see that first clean slice come out of the pan, you'll realize that the fridge is the only tool you really need for a stable, decadent dessert.
This no bake oreo pie is all about the contrast. You get the rustic, sandy texture of the crust against a filling that feels like a cross between a cheesecake and a mousse. It is a low stress way to impress people without the anxiety of a cheesecake cracking in the oven or a crust that won't brown.
Essential Quick Recipe Specs
Before we crack on with the mixing, let's look at the logistics. This is a patient recipe; the active work is a breeze, but the waiting is where the magic happens. If you try to rush the chilling process, you'll end up with a soup rather than a pie.
Right then, here is the breakdown for your planning.
| Servings | Ingredient Adjustments | Pan Size | Chill Time |
|---|---|---|---|
| 8 slices | Standard Schema | 9 inch pie plate | 6 hours |
| 12 slices | Increase all by 1.5x | 10 inch pan | 7 hours |
| 4 slices | Half all ingredients | 6 inch pan | 5 hours |
The Ingredient Deep Dive
To get that velvety consistency, you can't just grab any brand or temperature. The interaction between the fats is what creates the structure. If your cream cheese is too cold, you'll have lumps; if your cream is too warm, it won't hold air.
Air Suspension: Whipping heavy cream creates tiny bubbles that act as a structural scaffold, keeping the pie light.
Fat Stabilization: Full fat cream cheese provides the "anchor" that prevents the whipped cream from collapsing over time.
Binding Agent: Melted butter saturates the cookie crumbs, creating a waterproof seal that keeps the crust from getting soggy.
Sugar Crystallization: Powdered sugar dissolves instantly into the fat, ensuring a smooth texture without any graininess.
| Ingredient | Science Role | Pro Secret |
|---|---|---|
| Heavy Cream | Volume & Lift | Must be ice cold to maximize bubble stability |
| Cream Cheese | Structure | Use full fat; low-fat versions leak water |
| Oreo Cookies | Flavor & Base | Pulse to "fine sand" for a tighter crust |
| Unsalted Butter | Moisture Barrier | Melt slowly to avoid separating the fats |
Minimal Tools Needed
One of the best things about this recipe is that you don't need a kitchen full of gadgets. A food processor is the fastest way to handle the cookies, but a sturdy zip top bag and a rolling pin work just as well for a more rustic feel.
For the filling, a hand mixer is perfect. If you have a stand mixer such as KitchenAid, feel free to use it, but a simple hand mixer gives you more control over the peaks of the cream. Make sure your mixing bowl is chilled in the freezer for 10 minutes before whipping the cream; it helps the fat globules stay stable, which is a tip often shared by experts at King Arthur Baking.
Steps from Prep to Plate
Now, let's get into the actual assembly. Follow these steps closely, especially the folding part, to keep the filling airy.
- Pulse 24 Oreo cookies (340g) in a food processor until they resemble fine sand. Pour in 5 tbsp (70g) melted butter and pulse until the mixture looks like wet beach sand.
- Press the mixture firmly into the bottom and up the sides of the pie plate using the bottom of a measuring cup to pack it tight. Chill in the freezer for 10 minutes Note: This sets the butter so the walls don't crumble.
- Beat 8 oz (225g) slightly softened cream cheese and 1/2 cup (60g) sifted powdered sugar together until smooth. Add 1 tsp (5ml) vanilla extract.
- In a separate chilled bowl, whip 1 1/2 cups (355ml) ice cold heavy whipping cream until stiff peaks form. Wait until the cream stands straight up when you lift the whisk.
- Gently fold the whipped cream into the cream cheese mixture using a spatula; stop the moment no white streaks remain Note: Over mixing will deflate the air and make the pie dense.
- Fold in 10 coarsely chopped Oreo cookies (50g). Spoon the filling into the chilled crust and smooth the top with a spatula.
- Cover with plastic wrap touching the surface and refrigerate for at least 6 hours.
Chef's Tip: To get perfectly clean slices, dip your knife in hot water and wipe it dry between every single cut. This prevents the cream from sticking to the blade and smearing.
Solving Common Pie Problems

Even with a simple no bake oreo pie, things can go sideways if the temperatures aren't right. The most common issue is a filling that feels too soft, which usually comes down to the whipping stage.
The Reason Your Filling Is Runny
If the filling doesn't set, you likely under whipped the cream or used a low-fat cream cheese. The structure depends on the "stiff peaks" of the cream and the saturated fat of the cheese.
The Reason Your Crust Crumbles
A crumbly crust happens when the butter isn't fully incorporated or the crust wasn't pressed firmly enough. Using a flat bottomed cup to pack the crumbs is non negotiable.
The Reason Your Mix Is Lumpy
Lumps happen when the cream cheese is too cold when you start beating it. It should be "slightly softened," meaning it gives under your thumb but isn't melting.
| Problem | Root Cause | Solution |
|---|---|---|
| Filling is too soft | Under whipped cream | Whip cream until stiff peaks form |
| Crust is too sandy | Not enough butter/pressure | Press harder with a measuring cup |
| Lumpy texture | Cold cream cheese | Soften cheese for 30 mins before mixing |
Prevention Checklist
- ✓ Chill the mixing bowl and whisk before whipping cream
- ✓ Sift the powdered sugar to avoid tiny white clumps
- ✓ Press the crust firmly into the corners of the pan
- ✓ Use full fat ingredients for maximum stability
- ✓ Ensure the pie chills for a full 6 hours before slicing
Easy Dietary Adaptations
Depending on who you're serving, you might want to tweak a few things. Since this is a fat based dessert, substitutions usually change the texture more than the flavor.
If you need a more budget friendly option, you can substitute the name brand cookies for a generic chocolate sandwich cookie. The flavor is nearly identical, though the crumb might be slightly more coarse. For those looking for a different kind of richness, you could try a no bake instant condensed milk substitute to replace some of the sugar and cream for a denser, fudgy vibe.
| Original Ingredient | Substitute | Why It Works |
|---|---|---|
| Oreo Cookies | gluten-free Oreos | Similar taste and texture. Note: Ensure they are fully crushed |
| Powdered Sugar | Icing Sugar (Maple) | Adds a woody sweetness. Note: May slightly alter the color |
| Heavy Cream | Coconut Cream (Chilled) | High fat content. Note: Adds tropical notes and is vegan friendly |
Quick Decision Guide If you want it more tart, add 1 tbsp of lemon juice to the cream cheese. If you want it more chocolatey, add 2 tbsp of cocoa powder to the crust. If you want it lighter, fold in 1/2 cup of mini marshmallows.
Scaling Your Pie
When you're making a larger batch, don't just double everything blindly. Scaling fats and stabilizers requires a bit of nuance. For a 2x batch, I recommend increasing the salt or vanilla by only 1.5x to keep the flavors balanced.
If you are scaling down to a half batch for a small 6 inch pan, reduce the chilling time slightly, but never by more than an hour. The center of the pie needs that cold soak to set. If you're making multiple pies for a crowd, work in batches for the whipped cream.
If the cream sits too long while you're filling the first pie, it can start to separate or lose its lift.
Fast vs. Classic Approach
| Feature | Fast Method (4hr chill) | Classic Method (6hr+ chill) |
|---|---|---|
| Texture | Soft, mousse like | Firm, sliceable |
| Stability | Slight slump on plate | Holds sharp edges |
| Risk | May be too soft | Guaranteed set |
Truths About No Bake Desserts
There is a lot of misinformation about these types of treats. Let's set the record straight.
Myth: You need gelatin for a sliceable pie. Truth: Not if you use enough fat and air. The combination of full fat cream cheese and properly whipped heavy cream creates a natural structure that is just as stable as gelatin once chilled.
Myth: No bake pies are less "real" than baked ones. Truth: This is just a different method of stabilization. Instead of using heat to set proteins or starches, we are using cold to set fats. It is just as a valid culinary technique.
Storage and Zero Waste
This pie keeps surprisingly well in the fridge. Cover it tightly with plastic wrap to prevent it from absorbing any "fridge smells" (like that leftover onion in the back). It will stay velvety for up to 4 days.
For the freezer, you can store slices individually wrapped in parchment paper for up to 2 months. To reheat, don't use a microwave! Let the slice thaw in the fridge overnight. This preserves the air bubbles in the cream, similar to how you'd handle a Pumpkin Pie that has been chilled.
As for zero waste, if you have leftover cookie crumbs or a bit of melted butter, don't toss them. Mix them into your morning oatmeal or use them as a topping for a homemade parfait. Even the leftover cream cheese mixture can be stirred into a smoothie for a cheesecake flavored breakfast.
Pro Presentation Tips
Since the top of the pie is smooth and white, it's a blank canvas. To make it look less like a home project and more like a bakery find, add some height.
Instead of just crumbling Oreos on top, take a few whole cookies and press them vertically into the top of the filling around the edges. This creates a crown effect. You can also add a few fresh raspberries or a drizzle of melted dark chocolate to break up the monochrome look.
For the final touch, use a warm knife to cut the slices. This ensures the filling doesn't drag into the crust, leaving you with those sharp, professional lines that make a no bake oreo pie look truly impressive.
Recipe FAQs
Why is my filling too runny?
Ensure you refrigerate the pie for at least 6 hours. This window is critical for the cream cheese and whipped cream to stabilize into a sliceable texture.
How to keep the Oreo crust from crumbling?
Press the mixture firmly into the plate using the bottom of a measuring cup and chill in the freezer for 10 minutes. This sets the butter and locks the walls in place.
Is it true that I can use any type of cream cheese?
No, this is a common misconception. Full fat cream cheese is required to provide the structural stability needed for the filling to set without gelatin.
How to incorporate the whipped cream without deflating it?
Gently fold the cream into the cream cheese mixture using a spatula and stop the moment no white streaks remain. If you mastered the airy folding technique here, apply the same precision to the frosting in our hummingbird cake.
Can I store the pie in the freezer?
Yes, wrap slices individually in parchment paper. They stay fresh for up to 2 months, but you must thaw them in the fridge overnight to preserve the air bubbles in the cream.
How to store the pie for maximum freshness?
Cover the pie tightly with plastic wrap so the surface touches the filling. This prevents the dessert from absorbing fridge odors and keeps it velvety for up to 4 days.
Is it true that I must use a food processor for the crust?
No, this is a common misconception. You can crush the cookies in a sealed freezer bag using a rolling pin to achieve the same fine sand consistency.
No Bake Oreo Pie