Autumn Brew Boosters Mastering Three Essential Homemade Coffee Syrups
- The Craft Coffee Revolution Starts Here: Why DIY Syrups Win
- Meet the Trifecta: Our Essential Homemade Coffee Syrups for Fall
- Building the Base: Ingredients Required for Every Batch
- Gearing Up: The Non-Negotiable Kitchen Equipment
- Phase One: Creating the Master Simple Syrup Foundation
- Phase Two: Injecting the Signature Autumn Flavor Profiles
- Ensuring Freshness: Storing Your Homemade Coffee Syrups for Fall
- Recipe FAQs
- 📝 Recipe Card
The Craft Coffee Revolution Starts Here: Why DIY Syrups Win
The moment the air turns crisp, we instinctively reach for that perfect seasonal latte. Yet, relying on drive thru service for that authentic autumn taste often means paying a premium for heavily processed, artificially flavored concoctions. The solution?
Crafting your own truly robust Homemade Coffee Syrups for Fall . Taking control of your morning routine by learning how to make simple syrup for coffee at home transforms not just your beverage, but your budget and your kitchen confidence.
The fundamental difference lies in quality: while commercial syrups often rely on high fructose corn syrup and chemical extracts, mastering a few simple techniques allows you to infuse pure, natural flavor directly into your brews, resulting in a dramatically superior finished product.
Meet the Trifecta: Our Essential Homemade Coffee Syrups for Fall
We are diving deep into three essential autumn flavors that anchor any great seasonal menu: the classic Pumpkin Spice, the irresistible Salted Caramel, and the deeply comforting Toasted Marshmallow.
Together, these three syrups form the perfect arsenal of homemade coffee flavored syrup , each tailored to bring a unique dimension to your coffee, hot chocolate, or even cocktails.
The framework involves mastering one core technique the simple syrup for coffee recipe —and then applying specialized infusion methods for each flavor profile.
Calculating the Cost Savings of Homemade Coffee Syrups for Fall
The economic argument for making your own is compelling. This comprehensive recipe yields approximately one cup (240 ml) of each of the three distinct flavors. Considering a standard coffee shop serving uses between one to two tablespoons per drink, each batch provides enough flavor to produce 8 10 high-quality lattes.
When you compare the cost of three cups of sugar and water versus buying three commercial bottles of coffee syrup , the savings are instantly apparent and accumulate rapidly over the course of the season.
Decoding the Difference: Artificial vs. Real Flavor Intensity
The secret to truly excellent flavor is infusion, not extraction. By using actual ingredients like fresh spices, heavy cream, and toasted marshmallows we achieve complex, layered notes that artificial flavorings simply cannot replicate.
Our method for creating this homemade flavored simple syrup for coffee guarantees that the syrup tastes unequivocally real, bringing the authentic taste of autumn straight into your cup.
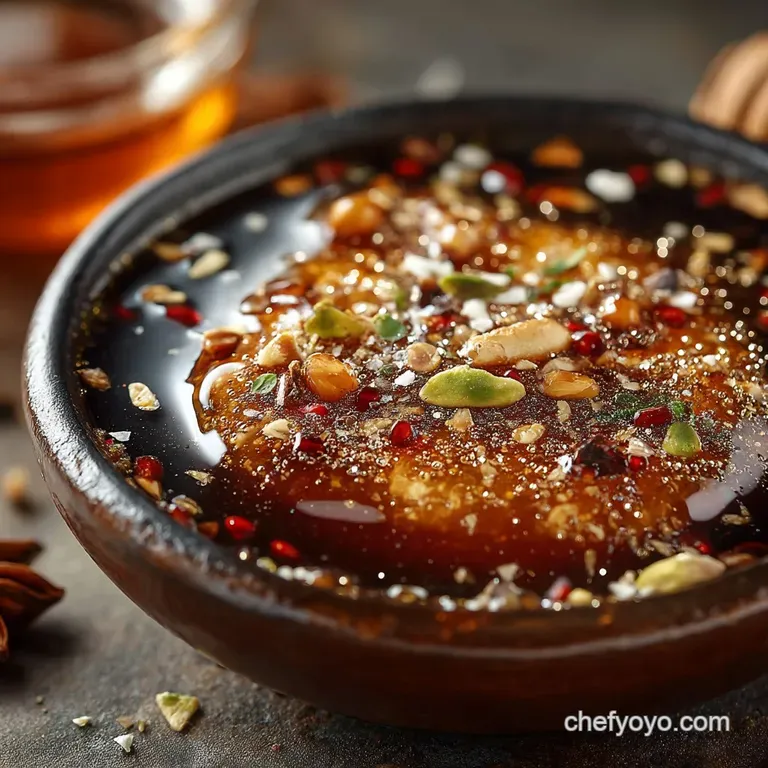
The Indulgent Classic: Perfecting Pumpkin Spice Extract
Our Pumpkin Spice variant achieves its signature warmth by combining 1/4 cup of real pumpkin purée (be certain it is not pie filling!) with a meticulous balance of ground cinnamon (1 tsp), ginger (1/2 tsp), and cloves (1/4 tsp).
The resulting syrup is intensely flavored, deeply colored, and perfectly spiced, requiring an essential straining step to ensure a smooth texture suitable for coffee beverages.
Achieving the Ideal Balance in Salted Caramel
The Salted Caramel focuses on achieving a rich, almost buttery intensity. This requires the inclusion of 1/2 cup of packed light brown sugar alongside the foundational granulated sugar.
The richness is amplified by incorporating a 1/4 cup of heavy cream into the caramelized mixture, while the complexity is provided by 1/2 tsp of flaky sea salt, divided between the cooking process and the finishing touch.
This balance is crucial; too much salt dulls the sweetness, while too little leaves the caramel one-dimensional.
Building the Base: Ingredients Required for Every Batch
The core of any successful homemade coffee syrup is the simple syrup foundation. For this trifecta of flavors, we utilize a 1:1 ratio of sugar to filtered water. To prepare three separate batches (yielding 1 cup of each flavor), you will need a total of 3 cups of granulated sugar and 3 cups (720 ml) of filtered water.
This initial master base is divided into three equal portions (1 cup of sugar and 1 cup of water for each flavor) before the specific autumn additions are incorporated.
Related Recipes Worth Trying
- Café Quality Homemade Vanilla Syrup for Coffee Secret Barista Recipe — Say cheerio to artificial flavours This Homemade Vanilla Syrup recipe uses a whole bean for deeply aromatic flavour perfect for your London Fog or latte...
- Hearty Lemon Herb Lentil Soup An Easy Comforting Recipe — Banish dreary days with this robust deeply flavoured Lentil Soup Its an easy lentil soup recipe that uses bloomed spices and fresh lemon for a vibrant lift...
- Ultimate Spanakopita Pie Flaky Phyllo Feta Spinach Comfort — This traditional Spanakopita recipe with phyllo delivers the ultimate flaky crunch and tangy fetaspinach filling Follow our tips for a perfect Greek...
Gearing Up: The Non-Negotiable Kitchen Equipment
While the process of making these syrups is categorized as easy, having the right setup ensures success and safety. You will need three small to medium heavy bottomed saucepans (or be prepared to wash one pan between batches), a whisk, a rubber spatula, and, most crucially for the Pumpkin Spice, a fine mesh sieve or muslin cloth for a flawlessly clear finished product.
Sugar Selection: Granulated vs. Brown Sugar for Depth
We primarily rely on fine granulated sugar for its clean dissolve and neutral color, which allows the natural hues of the spices and caramel to shine through. However, for the Salted Caramel batch, the addition of light brown sugar is indispensable.
The molasses content in the brown sugar lends a complexity and deeper, richer note that pure white sugar cannot replicate, enhancing the perceived depth of the caramel.
Water Quality: Using Filtered Water for Clear Flavor
Since water constitutes half of the syrup's volume, its quality significantly impacts the final taste. Using filtered water, rather than tap water, eliminates any residual mineral or chlorine tastes that could otherwise muddy the delicate flavor profile of your finished homemade coffee flavored syrup .
Why a Candy Thermometer is Recommended (But Not Mandatory)
A candy thermometer provides peace of mind, especially when tackling the caramelization stage of the Salted Caramel. Knowing the exact temperature can help prevent burning. However, the visual cue achieving a deep amber color is generally sufficient for this recipe, provided you monitor the sugars closely and remove the pan from the heat promptly before deglazing with the cream.
Sterilizing Bottles for Extended Shelf Life
Because these syrups contain no commercial stabilizers or preservatives, hygiene is paramount for maximizing storage time. Before bottling the finished product, it is non-negotiable to sterilize all glass containers and funnels thoroughly, mirroring the process used for preserving jams.
This ensures the best possible environment for your Homemade Coffee Syrups for Fall .
Phase One: Creating the Master Simple Syrup Foundation
The first step in how to make flavored simple syrup for coffee is establishing the clear, sweet base. Begin by dividing the total granulated sugar and filtered water into three equal parts. For each batch, combine the 1 cup of sugar and 1 cup of water in a small saucepan.
Place the pan over medium heat and stir gently until the sugar crystals are completely dissolved and the liquid is perfectly clear. Crucially, do not allow the mixture to come to a rapid, rolling boil yet; the goal at this stage is merely dissolution.
Once clear, set aside the warm simple syrup portions to await their distinct flavor infusion phase.
Phase Two: Injecting the Signature Autumn Flavor Profiles
This phase is where each syrup takes on its unique identity, moving beyond a basic simple syrup for coffee recipe into truly distinctive fall treats. Each method requires slightly different attention and technique.
The Gentle Simmer: Avoiding Crystallization During the Boil
Once the flavor elements have been introduced into the simple syrup base, you will bring the mixture to a gentle boil, then reduce the heat to simmer for 10– 12 minutes (for the pumpkin batch, for example). During this simmering process, avoid aggressive stirring.
Over agitation can cause residual sugar crystals adhering to the sides of the pan to fall back into the liquid, potentially leading to a grainy or cloudy final texture.
Cooling Procedures for Maximum Flavor Infusion
Flavor molecules need time to deepen and meld, particularly in the spiced syrups. After the required simmering period, remove the pan from the heat and allow the syrup to cool slowly.
For the Pumpkin Spice, this rest time is especially vital to allow the volatile oils from the cinnamon, ginger, and cloves to fully saturate the liquid before the necessary straining process.
The Caramelization Technique for Deep Salted Caramel
The Salted Caramel requires a slight departure from the standard simple syrup process. In a clean saucepan, combine the reserved portion of granulated sugar, the 1/2 cup of brown sugar, and just 1/4 cup of water. Heat this over medium high heat.
Resist the urge to stir; instead, swirl the pan occasionally until the sugars liquify and begin to turn a deep, rich amber color a process taking about 5– 8 minutes.
Immediately remove the pan from the heat and carefully whisk in the 1/4 cup of heavy cream (be prepared for vigorous bubbling!). Once incorporated, stir in the reserved simple syrup foundation and the flaky sea salt until the mixture is cohesive and glossy.
Infusing Spices: Maximizing the Pumpkin Blend Soak Time
After combining the pumpkin purée and spices with its simple syrup base, bring it to a gentle boil and simmer for the full 10– 12 minutes. Once the time is up, the crucial step is meticulous straining.
Pour the syrup slowly through a fine mesh sieve or, ideally, a piece of muslin cloth, pressing down lightly on the solids to extract every drop of liquid. This eliminates all pulp and spice remnants, leaving you with a clean, smooth, ready-to-use homemade flavored simple syrup for coffee .
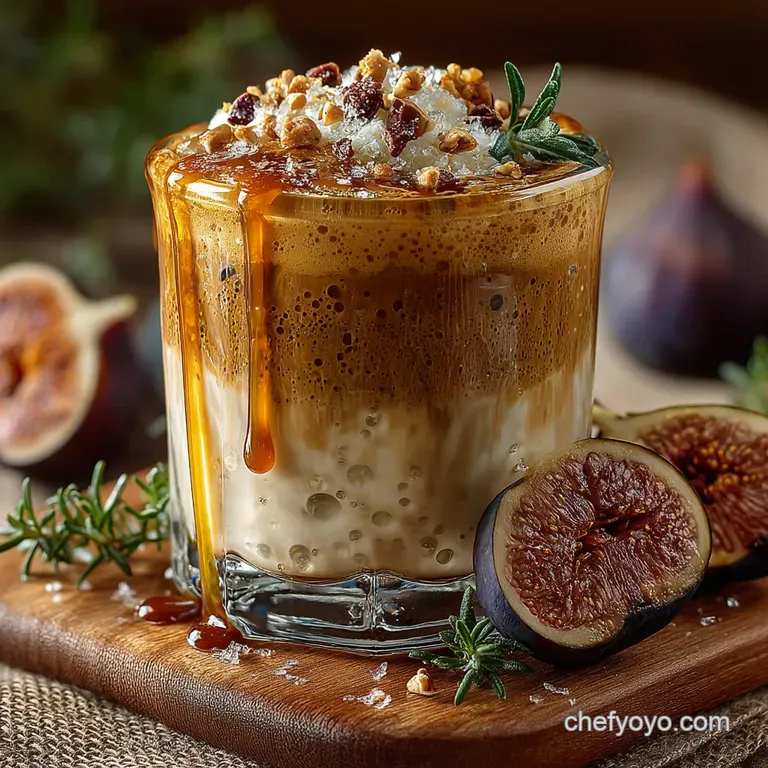
The Secret Step: Adding Smoky Depth to Toasted Marshmallow Syrup
The unique depth of the Toasted Marshmallow syrup comes entirely from caramelizing the sugar on the marshmallows themselves. Take 10 12 large white marshmallows and use a kitchen torch to deeply brown them, creating a smoky, slightly charred surface.
Alternatively, use a hot broiler for 30 60 seconds, watching constantly to prevent burning. Place these toasted marshmallows, the reserved simple syrup, an additional 1/4 cup of water, and 1/4 tsp of vanilla extract into a saucepan.
Simmer gently, stirring constantly, until the marshmallows have completely dissolved into the liquid (5– 7 minutes), achieving that distinctive, comforting campfire flavor.
Ensuring Freshness: Storing Your Homemade Coffee Syrups for Fall
Once cooled completely to room temperature, your syrups are ready for bottling. Use a funnel to transfer them into your sterilized jars or bottles, ensuring they are tightly sealed. Proper labeling with the flavor and date is highly recommended.
All Homemade Coffee Syrups for Fall must be stored in the refrigerator to maintain their freshness and quality.
How Long Do Homemade Syrups Actually Last?
Due to the high sugar content, which acts as a natural preservative, these homemade syrups enjoy a respectable shelf life. When stored continuously in the refrigerator in sterilized containers, you can expect the syrups to last effectively for 3 to 4 weeks.
Troubleshooting: What to Do If Your Syrup Becomes Too Thick
It is common, particularly with the Salted Caramel syrup (due to the added fats in the cream), for the syrup to thicken substantially when fully chilled. If you find your syrup is too viscous to pour cleanly, simply warm the needed serving portion in the microwave for 10 15 seconds before adding it to your cold brew or espresso beverage.
Beyond Coffee: Syrups in Cocktails and Baked Goods
The utility of these autumn boosters extends far beyond the morning cup. The Salted Caramel is magnificent drizzled over vanilla ice cream or used to elevate an apple crumble. The Toasted Marshmallow syrup is a truly intriguing base for an autumnal twist on a classic cocktail like an Old Fashioned or a creamy White Russian.
Meanwhile, the robust Pumpkin Spice syrup can be mixed directly into pancake or waffle batter for a seasonal breakfast treat.
Scaling Up: Calculating Large Batch Adjustments
The inherent beauty of the 1:1 simple syrup for coffee recipe ratio is its infinite scalability. If you wish to yield a larger volume say, four cups of a single flavor you simply multiply all ingredient quantities by four, maintaining the exact same proportions.
The only adjustment necessary when scaling up is an increase in the cook and simmer time, which should be monitored visually to ensure the syrup reaches the correct consistency.
Recipe FAQs
Right, so how long will these cracking Homemade Coffee Syrups for Fall actually keep in the fridge?
Syrups have a decent run thanks to the high sugar content, which acts as a preservative. If you've been a good egg and sterilised your bottles properly (treating them like jam jars is the ticket), they should last a comfortable 3 to 4 weeks in the refrigerator.
Always trust your nose, though! If the syrup looks cloudy, develops mould, or smells slightly off especially the dairy containing Salted Caramel it’s time to bin it, better safe than sorry!
My caramel or simple syrup seems a bit grainy or crystallised what did I do wrong, and how do I fix a syrup that’s too thick?
Graininess usually means sugar crystals formed a bit of a sticky wicket, that. It often happens if you stir the simple syrup aggressively while it's boiling. To fix it, add a teaspoon of water and reheat gently until the grains dissolve.
If your syrup thickens too much upon chilling (a common occurrence for the richer Salted Caramel), just pop the closed bottle into a mug of warm water or zap a small serving in the microwave for 10 seconds. It should loosen up nicely for easy drizzling.
I don't have a kitchen torch for the toasted marshmallow is it game over for that smoky flavour?
Not at all! While the torch is the quickest route to that satisfying smoky char, you can absolutely use your grill (known as the broiler across the pond). Place the marshmallows under the hottest setting, keeping the oven door ajar and watching them like a hawk!
They burn in seconds, but a quick, deep char gives you the necessary smokiness for that wonderful autumnal flavour profile. This method is far superior to simply melting them un-toasted.
Can I use a low-calorie sweetener, or make the Salted Caramel completely dairy-free for my flat white?
Absolutely, you can adjust sweeteners, but tread carefully! Swapping white sugar for alternative sweeteners like Monk Fruit or Erythritol might change the texture and often doesn't caramelise properly, so stick to a traditional sugar base if you can.
However, making the caramel dairy-free is a doddle. Simply switch out the heavy cream for full fat coconut milk or unsweetened cashew cream. This keeps the lovely richness required while remaining completely vegan, making it perfect for your oat-milk lattes.
Homemade Coffee Syrups For Fall

