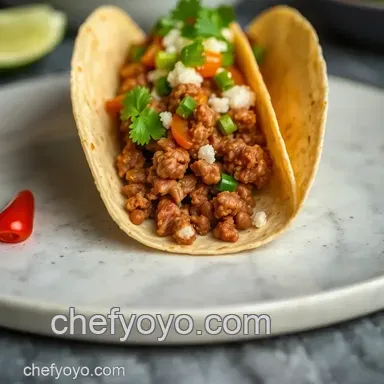
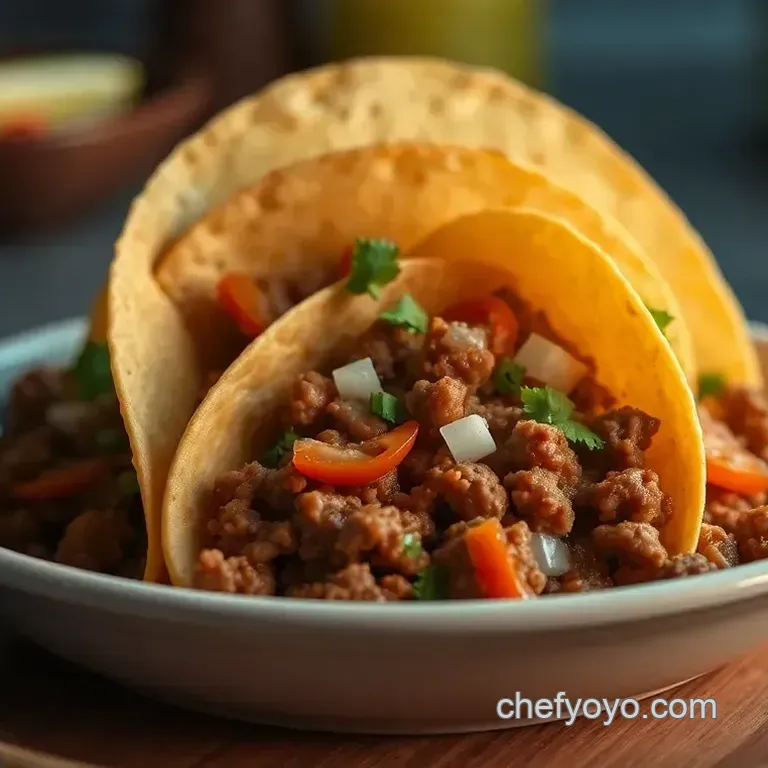
Walking Tacos: the Ultimate Portable Taco Snack
- Why Walking Tacos Recipe Is a Game-Changer for Taco Night
- The Roots and Rise of Walking Tacos
- What Makes This Recipe So Amazing—Beyond Just Taste
- The Ultimate Essential Ingredients Guide for Your Walking Taco Bar
- Mastering the Professional Cooking Method for Walking Tacos Recipe
- Insider Tips & Tricks for the Ultimate Walking Tacos Recipe
- Nailing That Picture-Perfect Walking Taco Presentation
- Storing & Make-Ahead Magic for Busy Hosts
- Fun Twists to Make It Your Own
- What’s on Your Plate? The Nutritional Lowdown
- Wrapping It Up: Why You’ve Got to Try This
- Frequently Asked Questions
- 📝 Recipe Card
Why Walking Tacos Recipe Is a Game Changer for Taco Night
Oh man, let me tell you… the first time i stumbled upon a walking tacos recipe , i was at this bustling state fair, surrounded by excited folks jamming music and kids running wild.
Someone handed me a tiny bag of chips loaded with juicy seasoned beef, melty cheese, beans, and fresh toppings all in one handy snack bag .
Eating it was like a flavor explosion, wrapped in convenience. no plate, no mess, just pure taco joy on the move! honestly, i was hooked.
If you’re anything like me, tired of the taco shells falling apart or the salsa spilling everywhere, this is the kind of recipe that fixes all those drama moments.
Plus, it’s perfect for a casual taco bar party or a laid back food bar setup where everyone gets to customize their own bags.
The best part? you can tailor it to what’s fresh or in your pantry simple, flexible, and downright delicious.
The Roots and Rise of Walking Tacos
Here’s a fun tidbit. the concept of walking tacos actually started in the midwestern u.s. at fairs and festivals, where portability was everything.
Instead of the traditional tacos mexicanos with tortillas, folks used crunchy chips as a base, transforming the whole experience into a kind of handheld fiesta.
Today, these little bags of goodness have exploded in popularity for good reason.
Fast forward to now, and these snacks have become a staple for everything from backyard cookouts to school fundraisers. you’ll see them popping up in lake food ideas summer parties because, let’s be real, there’s nothing better after a day of swimming and sun than a quick, tasty handheld meal.
The recipe is straightforward and fast around 30 minutes total. it’s pretty much beginner level cooking, which means no stress freak outs in the kitchen.
Cost wise, it’s budget friendly too. you can feed a group of four easily without breaking the bank, especially with pantry staples like canned beans, corn, and ready-made seasoning mixes.
Plus, snack bags like fritos or doritos are readily available in most grocery stores, which makes assembling a walking taco bar less of a headache.
What Makes This Recipe So Amazing Beyond Just Taste
Okay, so here’s why i keep coming back to this recipe. first off, the nutritional perks can’t be ignored. ground beef provides a solid punch of protein, while beans add fiber and keep things filling without weighing you down.
Toss in fresh veggies like juicy cherry tomatoes and zesty cilantro, and you’re snagging some vitamins and antioxidants, too. for those watching their diet, swapping in ground turkey or even a plant based crumble works wonders and keeps things lean.
The unique selling point? it’s the perfect blend of convenience and flavor. you get all the classic taco flavors cumin, chili powder, tangy lime with that crunch and creaminess from chips and sour cream.
Honestly, it’s like every bite is a mini celebration in your mouth. what’s more, it’s super kid-friendly and a big hit at casual parties or game nights when you want something everyone can grab and enjoy without fuss.
This recipe really shines during summer gatherings or tailgate parties. imagine a walking taco bar set up by the pool, with people mingling, sweating, and passing around snack bags loaded just the way they like ‘em.
No plates, no spills, no effort just fun, chill vibes.
Compared to other taco recipes, this one beats the classic taco night at home by ditching the mess. plus, the personalized walking tacos let everyone go wild with their toppings, which means no complaints and way more smiles.
Alright, now that you’ve got the scoop on why walking tacos rock, you’ll want to dive right into the ingredients and trust me, it’s a colorful lineup that’s as fun to prep as it is to eat.
Ready to grab your chips and gear up? let’s roll!
The Ultimate Essential Ingredients Guide for Your Walking Taco Bar
Okay, so you’re gearing up to make that killer walking tacos recipe for your next taco bar party , huh? trust me, i get it when i first tried to nail this, the hunt for the right ingredients was a bit of a wild goose chase.
To save you that headache, let’s break down the essentials and keep this fun, fresh, and foolproof!
Premium Core Components: What You Really Need
First off, forget the guesswork on measurements. for the meat filling, you wanna grab 1 lb (450 g) of ground beef or turkey leaner if you’re feeling healthy vibes.
When it comes to spices and liquids? stick to 1 tbsp (15 ml) olive oil , 1 small onion finely chopped , and 2 cloves garlic minced for that savory base.
How fresh should that onion be? pick a firm bulb with no soggy spots. same goes for your cherry tomatoes; they should be plump, vibrant red , and smell fresh.
Canned items like black beans and corn? rinse those babies well to keep the taste clean and store them sealed in your fridge for up to 4 days after opening trust me, mushy beans are a party foul.
I once learned the hard way that freezing your leftover cilantro doesn’t quite keep the zing it wilts fast. instead, keep it wrapped in a damp paper towel in the fridge crisper; this way, it’ll survive through your walking taco extravaganza.
Signature Seasoning Blend: The Flavor Game changer
Now, the magic’s in that spice combo. whether you grab a store-bought 1 oz (28 g) taco seasoning packet or mix your own with 1 tsp chili powder, ½ tsp cumin, ½ tsp paprika, and ¼ tsp oregano , this blend gives your walking tacos their punch.
Here’s a cool tip: add a pinch of smoked paprika to amp up the smokiness. it’s like the secret handshake of tacos mexicanos lovers.
For a fresh twist, throw in chopped fresh cilantro and a squeeze of lime right before serving it brightens up all those bold tex-mex flavors.
Oh, and if you wanna channel a regional vibe, try swapping regular paprika for chipotle powder to tap into that smoky Southwest feel. It’s killer!
Smart Substitutions: Keep It Flexible & Fun
Life’s full of surprises what if you run out of fritos or doritos? no worries! thick tortilla chips work great as a sturdy base for your walking tacos , or any crunchy food bars alternative like restaurant style corn chips.
For my lactose intolerant friend’s birthday party, i swapped sour cream with greek yogurt, and honestly? no one even noticed. plus, if you’re going vegetarian or vegan, cooked lentils or plant based crumbles jazzed up with taco seasoning make a perfect protein swap.
And hey, if you’re stuck on what to do during off-season for fresh tomatoes, canned diced tomatoes or a spoonful of salsa work just as well.
Keeps your taco bar versatile and summer ready, just like those day-after lake food ideas summer picnics we love.
Kitchen Equipment Essentials: No Fancy Gadgets Required
You don’t need a professional setup to throw a stellar taco bash. a simple large non-stick skillet will do the trick for browning your meat or plant proteins.
I swear by my trusty sharp knife and good cutting board for topping prep quarter those cherry tomatoes and dice onions without breaking a sweat.
Don’t have measuring spoons? eyeball it loosely! cooking is supposed to be fun, not math class. for assembling, the open chip bags are your serving bowls how cool is that? it’s casual, playful, and perfect for the “walk and eat” vibe.
Storing leftovers? Keep toppings in airtight containers and the meat filling in the fridge fridge for up to 3 days. Easy peasy.
Alright, now that you’re all set with your premium components, killer seasoning blend, savvy swaps, and kitchen gear, you’re ready to dive into putting it all together.
Ready for those step-by-step instructions on the best walking tacos you’ve ever had? let’s go!
Mastering the Professional Cooking Method for Walking Tacos Recipe
Alright, so you've decided to dive into the world of walking tacos recipe awesome choice! it’s one of those easy taco recipes that’s absolutely perfect for a taco bar party or even those chill lake food ideas summer days when you wanna keep it casual but tasty.
But hey, let me spill the tea on how to nail it like a pro without sweating bullets in the kitchen.
Set Yourself Up with Essential Prep Moves
Here’s the golden rule: mise en place . sounds fancy, but it just means getting all your stuff prepped and ready before you cook.
For these walking tacos , chop your onions, mince garlic, quarter cherry tomatoes, and get your toppings laid out in little bowls.
Trust me, when you’re juggling a snack bag full of goodies, there’s no time to scramble looking for jalapeños or cilantro.
Time management is clutch here. take about 15 minutes for prep to get everything chopped and organized. i’m talking line up your taco seasoning, meat, chip bags, and toppings like a pro.
It’s super satisfying (and way less stressful) when you’re not running around mid-cook.
Pro tip: arrange your kitchen space with all ingredients laid out in the order you’ll use them. keeps your flow smooth! oh, and never forget safety.
Keep raw meat off your toppings zone. wash those hands after handling raw beef it’s no joke!
The step-by-step Dance to Taco Perfection
Ready for the action? Here’s how I break it down.
- Heat 1 tbsp olive oil in a skillet over medium heat (around 350° F) . Toss in your onions and cook ‘em soft about 3- 4 minutes until translucent.
- Add garlic for a quick 30 seconds, then in goes the ground beef. Brown it well, stirring and breaking it up for 7- 8 minutes until no pink remains.
- Sprinkle in the taco seasoning, pour in ½ cup water , and let it simmer until thickened say about 3- 4 minutes . Remove from heat.
- If you want your chip bags warm and extra crunchy, pop them sealed in the oven at 200° F for 5 minutes . Don’t roast them just a gentle toast.
- Open those chip bags carefully, crush in some chips, mound on your seasoned meat, sprinkle cheese on top so it melts slightly with heat, and load on the beans, corn, tomatoes, sour cream, and cilantro.
- Squeeze lime over everything. That citrus zing really wakes everything up.
Visual cue: your cheese should look melty but not burnt, and the meat juicy but not soggy. Timing is key here don’t let the chips get soggy by assembling too early.
Unlocking Those Expert Level Kitchen Hacks
Here’s a little secret i learned after my third taco disaster: quality check those seasoning proportions. too much chili powder can overpower the meat.
Feel free to tweak seasoning to suit your taste buds.
Also, getting the meat browned properly is critical. If you crowd the pan, it steams instead of browns. So medium heat and don’t rush it!
Another pro tip: When crushing chips, be gentle. Torn bag? Total mess. Use your palm to gently crush the chips inside.
Sometimes meat can dry out keep an eye on moisture. A splash of water with seasoning keeps it flavorful and juicy.
If your party guests wanna mix up toppings, keep extras in bowls for that classic walking taco bar vibe. i once forgot the fresh lime, and you could tell.
Don’t skip the lime juice!
Boss Level Strategies for Perfect Walking Tacos Every Time
The biggest oops in my taco attempts? Doing everything last minute and trying to multitask. Always prep ahead and manage your cooking steps. Keep chip bags dry until assembly.
Quality check: use lean meat (at least 90% lean) to avoid slick grease pooling in the bag.
You can totally make this ahead by cooking the meat mixture a day before and reheating gently. just keep toppings fresh and not soggy.
Also, cheesy tops almost always do better if assembled last minute.
Finally, don’t forget to stash some extra napkins nearby. These Walking Tacos get messy but that’s half the fun!
Honestly, whipping up these tacos has become one of my favorite quick fixes for friends dropping by on game day or when i want that festive tacos mexicanos vibe without too much fuss.
You know, those casual “grab a bag and munch” moments? nothing beats it.
Alright, now that we got the method down, stick around because I’m gonna share some killer Additional Information like topping combos and drink pairings that’ll blow your mind!
Insider Tips & Tricks for the Ultimate Walking Tacos Recipe
Okay, so here’s the deal: walking tacos are pretty simple, but with a few little chef secrets, you can seriously up your game.
Honestly, i’ve found that warming the chip bags for just a few minutes in a low oven (say 200° f for 5 minutes ) makes the corn chips crunchier and way more satisfying.
Just don’t overdo it nobody wants a melty plastic bag situation, trust me!
Also, whenever i’m cooking the meat, i like to toss in a pinch of smoked paprika and a splash of lime juice right at the end.
That little zing totally wakes up the flavors. don’t skip the sour cream or greek yogurt dollop it adds a cooling creaminess that balances the spices perfectly.
Oh, and chop your onions finely and cook them down slowly it adds a subtle sweetness that’s hard to beat.
One time, i tried crushing the chips way too hard, and bam! the bag tore open and spilled everywhere. so, pro tip: crush gently from the top and use just enough force to make bite sized pieces.
It keeps your street food vibe intact without the messy fallout.
Nailing That Picture Perfect Walking Taco Presentation
Look, walking tacos might seem like casual, grab and-go food, but that doesn’t mean you can’t make ’em look instagram worthy. a little presentation goes a long way.
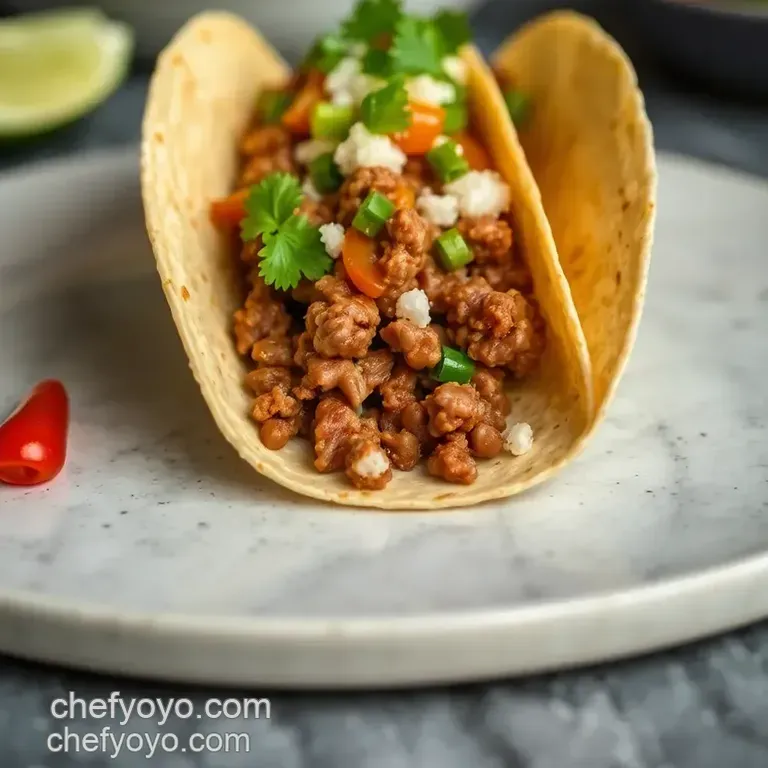
When scooping your taco filling, pile the meat tall but not overflowing. sprinkle bright green cilantro, a handful of cherry tomatoes for pops of color, and maybe a small slice of jalapeño if you like it spicy.
The color combo of cheesy yellows, fresh reds, and leafy greens just pops against those crunchy fritos.
I’m a sucker for a little garnish; a fresh lime wedge tucked on the side of the bag adds charm and invites your pals to squeeze in fresh juice themselves.
It’s just that simple trick that turns “snack in a bag” into a party hit.
Storing & make-ahead Magic for Busy Hosts
If you’re prepping for a walking taco bar or just trying to save time before a casual get-together, here’s what works best: cook your meat filling ahead of time and store it in an airtight container in the fridge for up to 3 days .
When you’re ready to serve, reheat gently on the stovetop or microwave until it reaches 165° f for safety . throwing together the walking tacos right before guests arrive preserves that fresh crunch.
Unfortunately, pre-crushing chips or assembling tacos too early can lead to soggy messes. so keep the chips whole and toppings fresh.
Store your chopped veggies separately in the fridge, too. this is especially clutch for summer parties by the lake or a quick taco fix after a long day.
Fun Twists to Make It Your Own
One of my favorite things about this easy taco recipe is how flexible it is. feeling adventurous? swap the classic ground beef for shredded rotisserie chicken or even pulled pork for that smoky, slow cooked vibe.
Going vegetarian has never been easier seasoned lentils or plant based crumbles work like a charm.
When summer rolls around, i love adding grilled corn and fresh summer salsa to the mix. it’s a perfect complement to the classic flavors and gives that fresh, seasonal angle.
And if you’re hosting a taco bar party , throw in some regional twists like adding pickled red onions from mexican street food or swapping cheddar for crumbled cotija cheese for that authentic mexicanos flair.
What’s on Your Plate? The Nutritional Lowdown
Here’s the honest scoop: a walking taco is a bit of an indulgence with around 550 calories and 30 grams of protein per serving but it gives you a balanced mix of carbs, fat, and protein.
With fresh veggies and beans in there, you’re scoring some fiber and nutrients too. for those watching sodium, just moderate how much taco seasoning you use.
If you want to keep portions reasonable, sticking to one snack bag per person is perfect. it’s filling but not overkill.
Want to lighten it up? use lean ground turkey , swap sour cream with greek yogurt, and go heavy on the veggies for extra vitamins without piling on extra fat.
Wrapping It Up: Why You’ve Got to Try This
So honestly, making this walking tacos recipe is like rediscovering taco night all over again. it’s fun, portable, and brings people together think of it as the perfect food bars twist for any casual party or a great lake food ideas summer dish when you want to keep things easy and fresh.
Whether you’re whipping these up for a crowd at your next walking taco bar or craving a tasty, fuss free dinner, this recipe hits all the right spots.
Just imagine everyone munching happily, hands messy but smiles wide. the best part? you don’t need a fancy setup or hours in the kitchen.
Just simple, bold flavors in a bag that everyone loves.
Give it a whirl, tweak it your way, and watch your guests come back for seconds. Trust me, once you go walking tacos, you’ll never look at regular tacos the same again!
Frequently Asked Questions
What are walking tacos, and how is this walking tacos recipe different from regular tacos?
Walking tacos are a fun and portable twist on traditional tacos, served directly in snack chip bags like Fritos or Doritos. Instead of soft or hard taco shells, the chips act as the base, topped with seasoned meat and classic taco fixings.
This style is perfect for casual events or on-the-go snacking, making taco night a bit more hands-on and less messy.
Can I make vegetarian or vegan walking tacos with this walking tacos recipe?
Absolutely! Substitute the ground meat with seasoned lentils, plant based crumbles, or sautéed mushrooms for a delicious vegetarian or vegan version. Just replace the cheese and sour cream with vegan alternatives, and you’ll have a cruelty free walking taco that’s just as tasty and satisfying.
How do I keep the chips from going soggy in walking tacos?
Great question! The key is to add the warm meat last and assemble the walking tacos just before serving. You can also gently crush the chips inside the bag to create smaller pieces, which helps spread out moisture.
Warming the chip bags briefly in a low oven before adding toppings enhances crunch without melting the bag.
Can I prepare walking tacos ahead of time, and how should I store leftovers?
You can cook and season the meat filling a day ahead, storing it in an airtight container in the fridge for up to 3 days. However, it’s best to assemble the walking tacos just before eating to maintain chip crunch.
Leftover fully assembled tacos can be refrigerated but the chips will soften enjoy them cold or reheat the meat topping separately.
Are walking tacos healthier than traditional tacos?
Walking tacos can be just as nutritious as regular tacos, depending on your ingredient choices. Using lean meat, adding plenty of fresh veggies, and opting for Greek yogurt instead of sour cream keeps it on the lighter side.
However, the chips add extra calories and sodium, so enjoy in moderation or consider baked chip alternatives for a healthier twist.
What are some tasty variations to try with this walking tacos recipe?
Mix it up by swapping ground beef for shredded chicken, pulled pork, or seasoned tofu. Spice things up with jalapeños or hot sauce, and try different chip flavours like spicy Doritos or classic Fritos.
You can also add unique toppings like guacamole, pickled onions, or crunchy cabbage slaw for extra texture and flavour.
Walking Tacos The Ultimate Portable Taco Snack