Flaky Perfection Traditional Spanakopita Triangles with Zesty Feta
Why Traditional Spanakopita Triangles are a Culinary Masterpiece
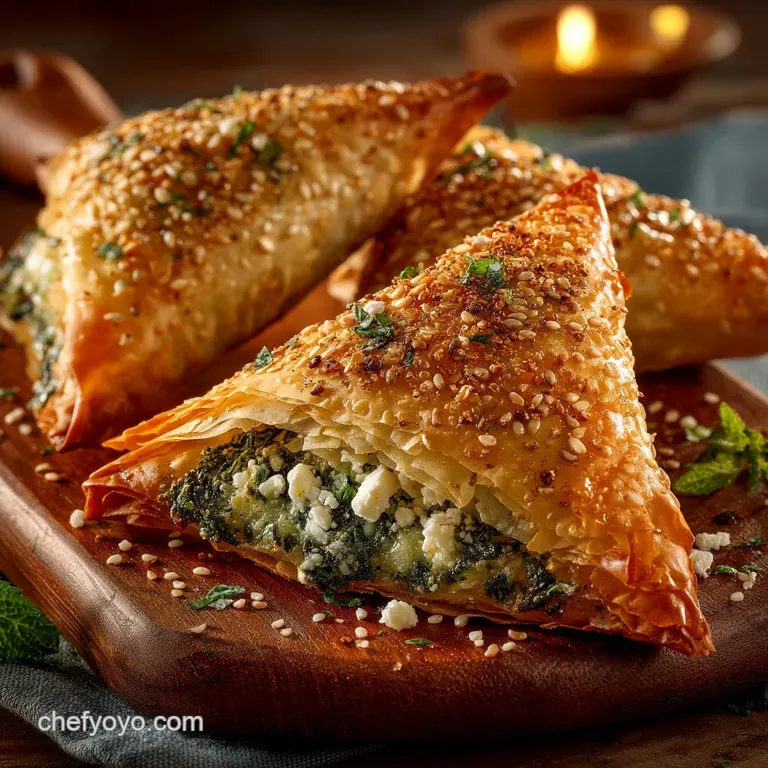
The world of Mediterranean cuisine is rich with savoury pastries, but few achieve the legendary status and universal appeal of spanakopita. This dish, based on a timeless combination of greens and cheese, offers unparalleled texture: a crackling, golden brown exterior giving way to a warm, tangy interior.
When prepared in the miniature, individual portion format known as spanakopitakia —they become the ideal Greek Food Snacks . This traditional greek spanakopita triangles recipe delivers the kind of shattering crispness that confirms its quality.
Achieving these Flaky Spanakopita Triangles requires patience and precision, but the result is a breathtaking appetiser or main dish that truly earns the title of Spanakopita Recipe Authentic . They are perfect for home entertaining, picnics, or adding flair to any buffet lineup.
The Historical Role of Pita and Pítes in Greek Cuisine
To understand spanakopita, one must first understand pita —the Greek word for pie or pastry, which has no connection to the modern, pocketed flatbread. Historically, pítes (plural) were the central pillar of everyday Greek cooking.
They were a ingenious way to use seasonal ingredients, often wrapped in simple dough to create portable, nutrient dense meals. Savoury pies often utilize seasonal vegetables, wild greens, or meats, encased in various types of dough, from thicker, yeast leavened crusts to the delicate, paper thin sheets of phyllo we use today.
The tradition of consuming these pies dates back to ancient times, cementing spanakopita’s place not merely as a dish, but as a crucial piece of culinary heritage.
Spanakopita vs. Spanakopitakia: Understanding the Mini Format
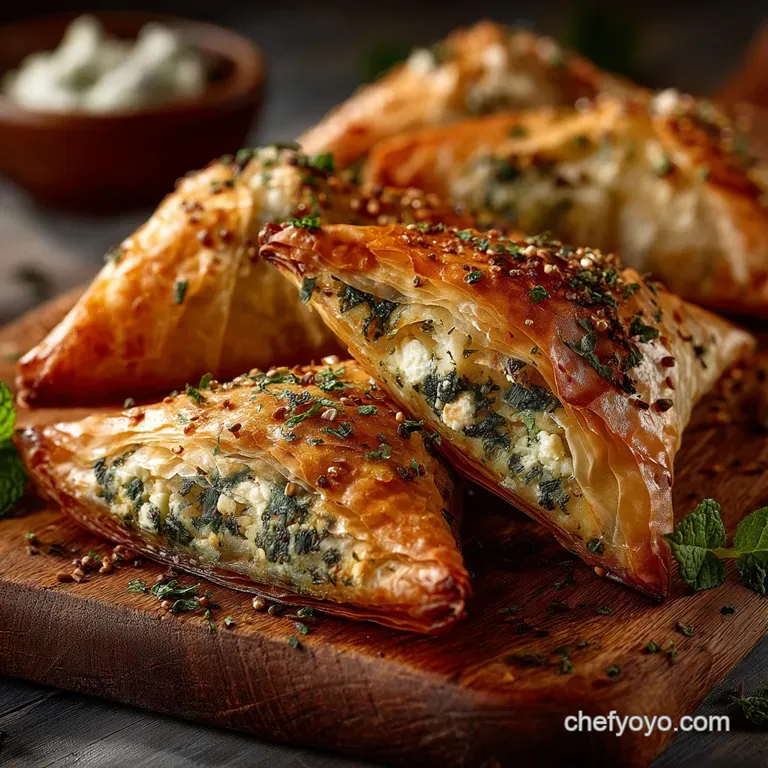
While the term Spanakopita technically refers to the full sized pie, usually baked in a deep pan and cut into squares, the individual servings are correctly called Spanakopitakia . When discussing the classic triangle format, we are almost always referring to these smaller versions.
These individual Traditional Spanakopita Triangles are generally preferred for entertaining because they simplify serving and offer a superior crust-to-filling ratio. They are the undeniable star among Greek Potluck Dishes , easily transported and eaten with minimal fuss.
This recipe focuses exclusively on the efficient folding and baking of the small, hand held triangles, yielding approximately 18 to 20 medium sized portions of flaky perfection.
The Essential Pantry Checklist for Authentic Spanakopita
Moving into the execution of this Spanokopita Recipe , success depends entirely on the quality and preparation of the core components. You should expect an estimated total time of 85 to 90 minutes, split between preparation, filling chilling, and baking.
Selecting Quality Feta and Fresh Herbs
The flavour backbone of this recipe rests on 10 ounces of quality, full fat feta cheese. Unlike pre-crumbled varieties, buying feta sold in brine ensures maximum moisture and tang. The cheese provides the necessary salinity, which means you must add salt sparingly to the mixture.
Equally important are the fresh herbs: 1/4 cup of fresh dill is absolutely non-negotiable, as its bright, anise like flavour is characteristic of true Greek preparation. This is augmented by 2 tablespoons of fresh parsley and a touch of 1/2 teaspoon of ground nutmeg, which provides an essential warming aroma that ties the greens and cheese together beautifully.
Four stalks of finely sliced spring onions are sautéed briefly in olive oil to soften their pungency before being added to the mix.
Preparing the Spinach Base: Squeezing Out Excess Moisture
If there is one non-negotiable step that dictates the difference between crisp Flaky Spanakopita Triangles and a disappointing soggy mess, it is moisture control. The recipe calls for 20 ounces of frozen chopped spinach, which must be fully thawed.
Once thawed, the spinach must be placed into a cheesecloth or a clean, robust kitchen towel and squeezed with extreme force. The goal is to remove every drop of liquid. Any remaining moisture will turn to steam inside the phyllo layers during baking, preventing them from crisping up and resulting in a chewy, damp crust.
This "squeeze test" ensures the filling remains dry and firm, contributing to the ultimate crispiness.
Necessary Tools for Working Quickly with Phyllo
Working with phyllo dough can seem intimidating, but having the right setup minimizes stress. The most crucial tool is a clean, slightly damp kitchen tea towel . Phyllo dries out incredibly quickly when exposed to air, turning brittle and unusable.
This towel must be kept draped over the unused stack of phyllo sheets at all times during assembly. You will also need a pastry brush (preferably silicone or natural bristle) for liberally applying the 8 ounces of melted unsalted butter, and a pizza cutter or sharp knife for efficiently slicing the pastry into 3- to 4 inch wide strips for folding.
Having all these items ready before you unroll the dough is essential for mastering this medium difficulty recipe.
Related Recipes Worth Trying
- Traditional Cabbage Roll Soup Recipe Golabki No Rolling Needed — Forget faffing with wraps This Hearty Cabbage Roll Soup delivers the classic deeply sweetandsour Golabki flavour in one simple pot Perfect for a soulwarming...
- The Best Traditional Shepherds Pie Recipe Rich Lamb Filling — Tired of pale imitations This easy Shepherds Pie recipe uses slowsimmered lamb and the fluffiest mash for true comfort food Get the definitive recipe
- Classic Creamy Egg Salad My Secret Traditional Recipe for Perfect Sandwiches — Stop making watery sandwiches This Classic Creamy Egg Salad is velvety perfectly seasoned and uses my foolproof Hardboiled egg recipe for no grey ring yolks...
Executing the Recipe: Seamlessly Building Flaky Layers
The preparation phase is now complete, and we move into the assembly that defines the delicious outcome of this traditional greek spanakopita triangles recipe .
Creating the Creamy, Tangy Spinach Filling
With the spinach completely dry, you can now build the flavour of the filling. Begin by sautéing the finely sliced spring onions in 1 tablespoon of olive oil until softened.
Once cooled slightly, combine the dry spinach, the sautéed onions, the crumbled feta, the fresh herbs, the nutmeg, pepper, and one lightly beaten large egg in a bowl. The egg acts as the crucial binder, holding the mixture together once heated.
Mix until just combined; overmixing can cause the feta to become paste like. Crucially, the filling must then be covered and chilled in the refrigerator for a minimum of 30 minutes.
This chilling time firms up the mixture, making it much easier to scoop and fold neatly inside the delicate phyllo.
Mastering the Art of Folding Traditional Spanakopita Triangles
Once the filling is chilled and the butter is melted, lay out your workstation. The technique requires using two sheets of phyllo dough at a time to ensure structural integrity. Lay the double sheet flat, then generously brush the entire top surface with melted butter.
Next, use a sharp cutter to slice the buttered double sheet lengthwise into three or four consistent strips, about 3 to 4 inches wide. Place approximately 1 tablespoon of the chilled filling at the bottom corner of a strip.
The folding process is akin to folding a flag: lift the corner and fold it diagonally over the filling to create the first triangle, ensuring the edges align. Continue folding the triangle up the strip until you reach the end, sealing the pocket neatly.
This careful construction is the foundation of the truly authentic Recipe For Spanakopita .
Achieving the Ultimate Crunch: Temperature and Time Guidelines
For the perfect, audible crunch, temperature control is paramount. Preheat your oven to 375°F (190°C). Arrange the assembled triangles seam side down on a parchment lined baking sheet.
Before they go into the heat, generously brush the tops of all the Spanakopita triangles recipe portions with any remaining melted butter. This final layer of fat promotes deep caramelization and maximum flakiness.
Bake the triangles for 25 to 30 minutes, rotating the pan halfway through. The goal is a deep, rich golden brown colour that signifies the countless layers of phyllo have achieved their optimal crispness. Allow them to cool slightly on the tray for five minutes before serving warm.
Beyond the Baking Sheet: FAQs for Traditional Spanakopita Triangles
Understanding how to manage the unique challenges of phyllo and maximize the lifespan of your perfectly baked pastries ensures every bite is as intended.
Troubleshooting Common Phyllo Mistakes
The primary challenge when making Traditional Spanakopita Triangles is managing the fragile phyllo dough. The number one mistake is allowing the sheets to dry out remember to keep them diligently covered with that slightly damp tea towel.
If a sheet tears while you are working, don’t panic; the layering and buttering process is forgiving. Simply place the torn sheet underneath a whole one, brush liberally with butter, and continue. The rich butter acts as an adhesive, melding the tears back into the layered structure.
Working quickly (ensuring your mise en place is perfect beforehand) and keeping your filling cool are the best defenses against phyllo catastrophe.
Freezing and Reheating Instructions for Peak Flakiness
Spanakopita triangles are excellent candidates for make-ahead preparation. For the best result, freeze the triangles raw . Complete the entire assembly and folding process, including the final brush of butter, but do not bake them.
Place the assembled triangles on a sheet pan and flash freeze them until solid. Once frozen, transfer them to a heavy duty freezer bag or airtight container. To cook, simply place the frozen triangles directly onto a baking sheet and bake at 375°F (190°C), adding an extra 10 to 15 minutes to the total baking time.
This preserves the internal moisture and allows the pastry to puff up beautifully, maintaining peak flakiness upon serving.
Serving Pairings: What to Drink with Your Savory Pastry?
The rich, salty, and tangy nature of the filling requires complementary flavours. If you are wondering what to serve with spanakopita triangles , consider dishes that offer coolness and acidity.
The undisputed champion is Tzatziki the creamy coolness of the cucumber yogurt dip provides a refreshing counterpoint to the hot, salty pastry. Alternatively, a simple Horiatiki (Greek Village Salad) dressed with good olive oil and vinegar cuts through the richness beautifully.
For beverages, a crisp, dry white wine like a Greek Assyrtiko or a chilled Sauvignon Blanc perfectly complements the bright dill and feta notes.
Making it Your Own: Flavor Swaps and Dietary Adaptations
While this is a strictly defined recipe for traditional flavour, there are approved adaptations for those seeking slight variations. For a creamier texture and less aggressive saltiness, you can substitute up to half of the feta with well drained full fat ricotta cheese.
If you enjoy brightness, consider adding the zest of one lemon to the spinach mixture. Another excellent variation is to swap out some of the fresh dill for 2 tablespoons of fresh mint, which is a common herb usage in certain regional Greek recipes.
For a faster, albeit less traditional approach, all-butter puff pastry can be used instead of phyllo, significantly reducing the complexity of the assembly process.
Recipe FAQs
Can I prepare these Traditional Spanakopita Triangles ahead of time, like the day before?
Absolutely, they are brilliant for making ahead, which is a massive help when entertaining. You can assemble all your Traditional Spanakopita Triangles, brush them generously with butter, and then tightly cover the baking sheet with cling film before popping them in the fridge for up to 24 hours.
Just bake them straight from the fridge they might need an extra five minutes in the oven, but that perfect crisp finish is well worth the slight adjustment.
Why does my spanakopita filling sometimes make the phyllo pastry go a bit soggy?
This is the most common hiccup, and it’s almost always down to watery spinach. You need to squeeze it until it’s bone dry think less damp tea towel, more Wringing Out the Trousers after a torrential downpour!
Secondly, make sure your filling is completely cool before you start the assembly process, otherwise the residual heat creates steam when baking, leading to a disappointing soggy bottom.
Help! My phyllo pastry is cracking faster than a cheap vase; what am I doing wrong?
Phyllo is a right diva, isn't it? The key to success is moisture management: keep the entire stack covered with a clean, slightly damp tea towel while you work, only revealing two sheets at a time for assembly.
If you’re still struggling, ensure you are brushing enough melted butter or clarified butter between the layers, as this essential fat helps to keep the pastry pliable during the folding process.
I find feta a bit strong; can I use a different cheese in the filling?
You certainly can tone down the zing! While feta is traditional, substituting half of it with well drained full fat ricotta or even cream cheese creates a creamier, milder texture that some prefer.
Just ensure whatever replacement you choose is quite firm and not adding extra moisture to the mix, which might otherwise jeopardise the pastry’s crispness.
Can I freeze these little pastries, and if so, how do I bake them from frozen?
Yes, they freeze beautifully! Place the assembled, unbaked triangles on a tray and flash freeze them until solid, then transfer them to a sturdy freezer bag or container for up to three months.
When you’re ready to bake, place them directly onto a baking sheet (no need to thaw) and add 10 to 15 minutes to the total baking time, until they are deeply golden brown and cooked through.
Flaky Traditional Spanakopita Triangles

